Epson MX-70 User Manual - Page 19
Feeding the Paper
 |
View all Epson MX-70 manuals
Add to My Manuals
Save this manual to your list of manuals |
Page 19 highlights
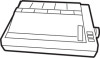
Chapter 1 To install the rack, simply spring the wires a bit so they pop into the holes in the printer frame, as shown in Figure l-8. Figure l-8 Feeding the Paper The MX-70 accepts pin-feed paper between 4" and 10" wide. Both the left and right hand tractors are adjustable to match the spacing between the drive holes. (We never get too far from the land, do we?) Position the box or stack of paper behind and below the printer. Reliable operation depends somewhat on the weight of the paper keeping itself taut (Figure 1-9). Figure 1-9 8
-
 1
1 -
2
-
3
-
4
-
5
-
6
-
7
-
8
-
9
-
10
-
11
-
12
-
13
-
 14
14 -
 15
15 -
 16
16 -
 17
17 -
 18
18 -
 19
19 -
 20
20 -
 21
21 -
 22
22 -
 23
23 -
 24
24 -
25
-
26
-
27
-
28
-
29
-
30
-
31
-
32
-
33
-
34
-
35
-
36
-
37
-
38
-
39
-
40
-
41
-
42
-
43
-
44
-
45
-
46
-
47
-
48
-
49
-
50
-
51
-
52
-
53
-
54
-
55
-
56
-
57
-
58
-
59
-
60
-
61
-
62
-
63
-
64
-
65
-
66
-
67
-
68
-
69
-
70
-
71
-
72
-
73
-
74
-
75
-
76
-
77
-
78
-
79
-
80
-
81
-
82
-
83
-
84
-
85
-
86
-
87
-
88
-
89
-
90
-
91
-
92
-
93
-
94
-
95
-
96
-
97
-
98
-
99
-
100
-
101
-
102
-
103
-
104
-
105
-
106
-
107
 |
 |

Chapter 1
To install the rack, simply spring the wires a bit so they pop into the holes in the
printer frame, as shown in Figure l-8.
Figure l-8
Feeding the Paper
The MX-70 accepts pin-feed paper between 4” and 10” wide. Both the left and
right hand
tractors
are adjustable to match the spacing between the drive holes.
(We never get too far from the land, do we?)
Position the box or stack of paper behind and below the printer. Reliable
operation depends somewhat on the weight of the paper keeping itself taut
(Figure 1-9).
Figure 1-9
8