Epson MX-70 User Manual - Page 16
Opening the Case
 |
View all Epson MX-70 manuals
Add to My Manuals
Save this manual to your list of manuals |
Page 16 highlights
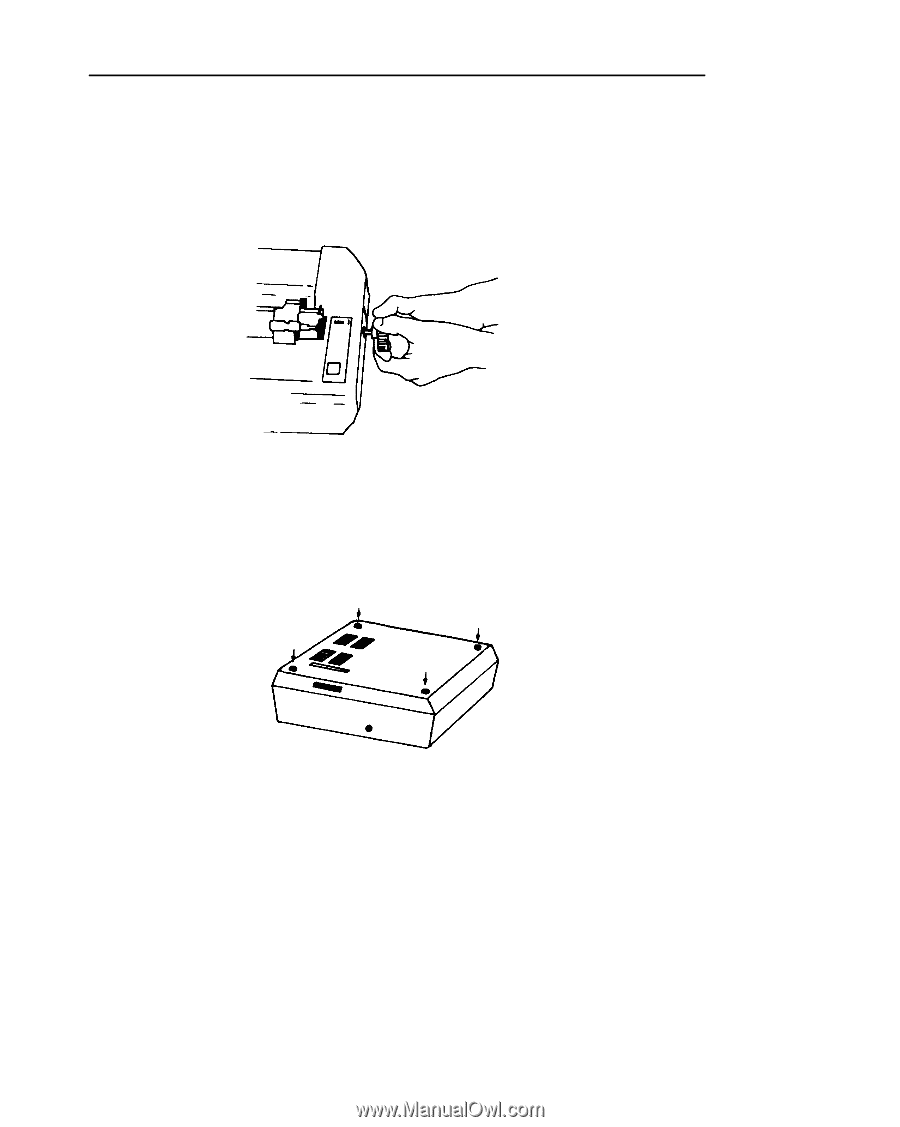
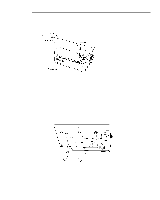
The Starting Line Opening the Case To locate the wiring terminals, we have to open the case. The lid should still be off. Remove the roller knob by pulling straight out, with firm but steady pressure (Figure l-5). Figure 1-5 Turn the printer upside down on a soft surface. With a Phillips-head screwdriver, completely loosen (but don't remove) all 4 corner screws as shown in Figure l-6. Place tape over the 4 holes so the screws won't fall out when we tip the printer right-side up again. Figure 1-6 Now tip the printer right-side up again. Gently wiggle the top cover loose. Wires are booked to it! We are not going to completely remove the cover - only open it enough to gain access to the main wiring board. Lift the cover up, mostly from the left side, and slide it gently to the right to free it from the roller shaft. Be careful not to pull the wires on the right-hand side. With just a bit of class we can maneuver the cover so it stands solidly in place, as a sentinel guarding the goodies. 5
-
 1
1 -
2
-
3
-
4
-
5
-
6
-
7
-
8
-
9
-
10
-
 11
11 -
 12
12 -
 13
13 -
 14
14 -
 15
15 -
 16
16 -
 17
17 -
 18
18 -
 19
19 -
 20
20 -
 21
21 -
22
-
23
-
24
-
25
-
26
-
27
-
28
-
29
-
30
-
31
-
32
-
33
-
34
-
35
-
36
-
37
-
38
-
39
-
40
-
41
-
42
-
43
-
44
-
45
-
46
-
47
-
48
-
49
-
50
-
51
-
52
-
53
-
54
-
55
-
56
-
57
-
58
-
59
-
60
-
61
-
62
-
63
-
64
-
65
-
66
-
67
-
68
-
69
-
70
-
71
-
72
-
73
-
74
-
75
-
76
-
77
-
78
-
79
-
80
-
81
-
82
-
83
-
84
-
85
-
86
-
87
-
88
-
89
-
90
-
91
-
92
-
93
-
94
-
95
-
96
-
97
-
98
-
99
-
100
-
101
-
102
-
103
-
104
-
105
-
106
-
107
 |
 |