Epson MX-70 User Manual - Page 14
Installing the Ribbon
 |
View all Epson MX-70 manuals
Add to My Manuals
Save this manual to your list of manuals |
Page 14 highlights
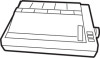
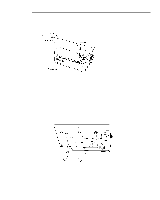
Installing the Ribbon Position the printer with the Epson label (front) facing you. Locate the paper bail (the moveable metal bar with numbers l-80 on it - see Figure l-3) and push it toward the back of the printer, against the metal platen. Remove the ribbon cartridge from its box and turn the plastic knob counterclockwise so the ribbon is tight. (Figure l-4A) The Starting Line Figure 1-4A Hold the cartridge by its vertical fin (sounds like a shark). Steer the 4 tabs on its sides into the 4 slots in the printer's metal frame (Figure 1-4B). Press the cartridge firmly into place. Figure 1-4B Using a pencil (or your fingers), lift the ribbon onto the slot in front of the print head, as shown in Figure 1-4C. With a little practice, we can do all of the above in one quick operation. 3
-
 1
1 -
2
-
3
-
4
-
5
-
6
-
7
-
8
-
 9
9 -
 10
10 -
 11
11 -
 12
12 -
 13
13 -
 14
14 -
 15
15 -
 16
16 -
 17
17 -
 18
18 -
 19
19 -
20
-
21
-
22
-
23
-
24
-
25
-
26
-
27
-
28
-
29
-
30
-
31
-
32
-
33
-
34
-
35
-
36
-
37
-
38
-
39
-
40
-
41
-
42
-
43
-
44
-
45
-
46
-
47
-
48
-
49
-
50
-
51
-
52
-
53
-
54
-
55
-
56
-
57
-
58
-
59
-
60
-
61
-
62
-
63
-
64
-
65
-
66
-
67
-
68
-
69
-
70
-
71
-
72
-
73
-
74
-
75
-
76
-
77
-
78
-
79
-
80
-
81
-
82
-
83
-
84
-
85
-
86
-
87
-
88
-
89
-
90
-
91
-
92
-
93
-
94
-
95
-
96
-
97
-
98
-
99
-
100
-
101
-
102
-
103
-
104
-
105
-
106
-
107
 |
 |
