Epson PowerLite 7200 User Manual - Page 102
Installing the Software for a Macintosh, Launching the Software
 |
View all Epson PowerLite 7200 manuals
Add to My Manuals
Save this manual to your list of manuals |
Page 102 highlights
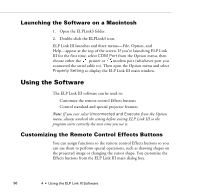
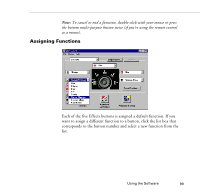
Installing the Software for a Macintosh Follow these steps to install the software for the Macintosh: 1. Insert the Projector Software CD into your CD-ROM drive. 2. Open the CD-ROM drive icon, if necessary. 3. Double-click the Installer icon. 4. You see a dialog box asking you to select a language for the software. Select a language and click OK. 5. You see the ELP Link III main menu. Click Install ELP Link III V2.0. 6. You see the Software License Agreement screen. Read the agreement and click Accept. 7. You see the Installer dialog box. Click Install. The installer copies the program to your hard disk. 8. When the installation is finished, click Quit. Launching the Software Follow the steps in the appropriate section below to launch the software. If you're using the remote control as a mouse, use the pointer button to position the cursor and the bottom multi-purpose button to launch the software. Note: If you have a Macintosh, your screens may look slightly different than the screens in this chapter. 94 4 • Using the ELP Link III Software
-
 1
1 -
2
-
3
-
4
-
5
-
6
-
7
-
8
-
9
-
10
-
11
-
12
-
13
-
14
-
15
-
16
-
17
-
18
-
19
-
20
-
21
-
22
-
23
-
24
-
25
-
26
-
27
-
28
-
29
-
30
-
31
-
32
-
33
-
34
-
35
-
36
-
37
-
38
-
39
-
40
-
41
-
42
-
43
-
44
-
45
-
46
-
47
-
48
-
49
-
50
-
51
-
52
-
53
-
54
-
55
-
56
-
57
-
58
-
59
-
60
-
61
-
62
-
63
-
64
-
65
-
66
-
67
-
68
-
69
-
70
-
71
-
72
-
73
-
74
-
75
-
76
-
77
-
78
-
79
-
80
-
81
-
82
-
83
-
84
-
85
-
86
-
87
-
88
-
89
-
90
-
91
-
92
-
93
-
94
-
95
-
96
-
 97
97 -
 98
98 -
 99
99 -
 100
100 -
 101
101 -
 102
102 -
 103
103 -
 104
104 -
 105
105 -
 106
106 -
 107
107 -
108
-
109
-
110
-
111
-
112
-
113
-
114
-
115
-
116
-
117
-
118
-
119
-
120
-
121
-
122
-
123
-
124
-
125
-
126
-
127
-
128
-
129
-
130
-
131
-
132
-
133
-
134
-
135
-
136
-
137
-
138
-
139
-
140
-
141
-
142
-
143
-
144
-
145
-
146
-
147
-
148
-
149
-
150
-
151
-
152
-
153
-
154
 |
 |
