Epson PowerLite Home 10 User Manual - Page 18
Adjusting the Appearance of the Picture, color and quality.
 |
View all Epson PowerLite Home 10 manuals
Add to My Manuals
Save this manual to your list of manuals |
Page 18 highlights
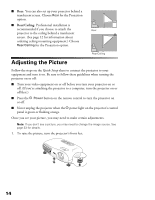
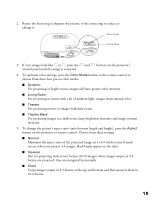
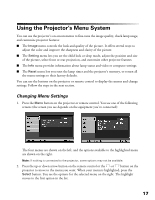
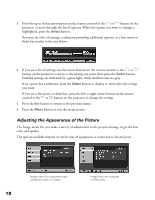
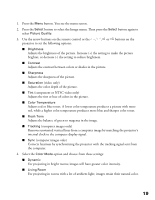
3. Press the up or down arrow button on the remote control or the or button on the projector to move through the list of options. When the option you want to change is highlighted, press the Select button. You may see a list of settings, a submenu providing additional options, or a line menu or slider bar similar to the one below: 4. If you see a list of settings, use the arrow buttons on the remote control or the or button on the projector to move to the setting you want, then press the Select button. Enabled settings are indicated by a green light, while disabled ones are gray. If an option has a submenu, press the Select button to display it, then select the setting you want. If you see a line menu or slider bar, press the left or right arrow button on the remote control or the or button on the projector to change the setting. 5. Press the Esc button to return to the previous menu. 6. Press the Menu button to exit the menu system. Adjusting the Appearance of the Picture The Image menu lets you make a variety of adjustments to the projected image to get the best color and quality. The options available depend on which type of equipment is connected to the projector: 18 Image menu for component video, composite video, or S-video Image menu for computer or RGB video
-
 1
1 -
2
-
3
-
4
-
5
-
6
-
7
-
8
-
9
-
10
-
11
-
12
-
 13
13 -
 14
14 -
 15
15 -
 16
16 -
 17
17 -
 18
18 -
 19
19 -
 20
20 -
 21
21 -
 22
22 -
 23
23 -
24
-
25
-
26
-
27
-
28
-
29
-
30
-
31
-
32
-
33
-
34
-
35
-
36
-
37
-
38
-
39
-
40
-
41
-
42
-
43
-
44
 |
 |
