Epson R300 User Manual - Page 22
Choosing Basic Mode or Advanced Mode, Selecting Photos for Printing - stylus photo r300m printer
 |
UPC - 010343848818
View all Epson R300 manuals
Add to My Manuals
Save this manual to your list of manuals |
Page 22 highlights
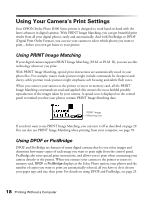
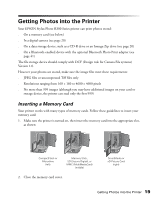
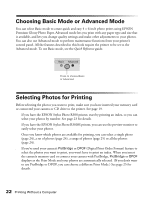
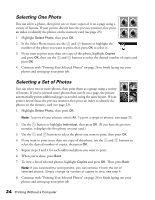
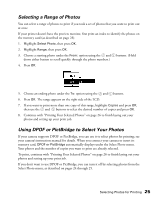
Choosing Basic Mode or Advanced Mode You can select Basic mode to create quick and easy 4 × 6-inch photo prints using EPSON Premium Glossy Photo Paper. Advanced mode lets you print with any paper type and size that is available, and lets you change quality settings and make other adjustments to your photos. You can also use Advanced mode to perform maintenance functions from your printer's control panel. All the features described in this book require the printer to be set to the Advanced mode. To use Basic mode, see the Quick Reference guide. Press to choose Basic or Advanced Selecting Photos for Printing Before selecting the photos you want to print, make sure you have inserted your memory card or connected your camera or CD drive to the printer. See page 19. ■ If you have the EPSON Stylus Photo R300 printer, start by printing an index, so you can select your photos by number. See page 23 for details. If you have the EPSON Stylus Photo R300M printer, you can use the preview monitor to easily select your photos. Once you know which photos are available for printing, you can select a single photo (page 24), a set of photos (page 24), a range of photos (page 25) or all the photos (page 24). ■ If you've used your camera's PictBridge or DPOF (Digital Print Order Format) feature to select the photos you want to print, you won't have to print an index. When you insert the camera's memory card or connect your camera with PictBridge, PictBridge or DPOF displays as the Print Mode and your photos are automatically selected. (If you don't want to use PictBridge or DPOF, you can choose a different Print Mode.) See page 25 for details. 22 Printing Without a Computer
-
 1
1 -
2
-
3
-
4
-
5
-
6
-
7
-
8
-
9
-
10
-
11
-
12
-
13
-
14
-
15
-
16
-
 17
17 -
 18
18 -
 19
19 -
 20
20 -
 21
21 -
 22
22 -
 23
23 -
 24
24 -
 25
25 -
 26
26 -
 27
27 -
28
-
29
-
30
-
31
-
32
-
33
-
34
-
35
-
36
-
37
-
38
-
39
-
40
-
41
-
42
-
43
-
44
-
45
-
46
-
47
-
48
-
49
-
50
-
51
-
52
-
53
-
54
-
55
-
56
-
57
-
58
-
59
-
60
-
61
-
62
-
63
-
64
-
65
-
66
-
67
-
68
-
69
-
70
-
71
-
72
-
73
-
74
-
75
-
76
-
77
-
78
-
79
-
80
-
81
-
82
-
83
-
84
-
85
-
86
-
87
-
88
-
89
-
90
-
91
-
92
-
93
-
94
-
95
-
96
-
97
-
98
-
99
-
100
-
101
-
102
-
103
-
104
-
105
-
106
-
107
-
108
-
109
-
110
-
111
-
112
-
113
-
114
-
115
-
116
-
117
-
118
-
119
-
120
-
121
-
122
-
123
-
124
 |
 |
