Epson R300 User Manual - Page 35
Printing With Iron-On Transfer Paper, Optionally
 |
UPC - 010343848818
View all Epson R300 manuals
Add to My Manuals
Save this manual to your list of manuals |
Page 35 highlights
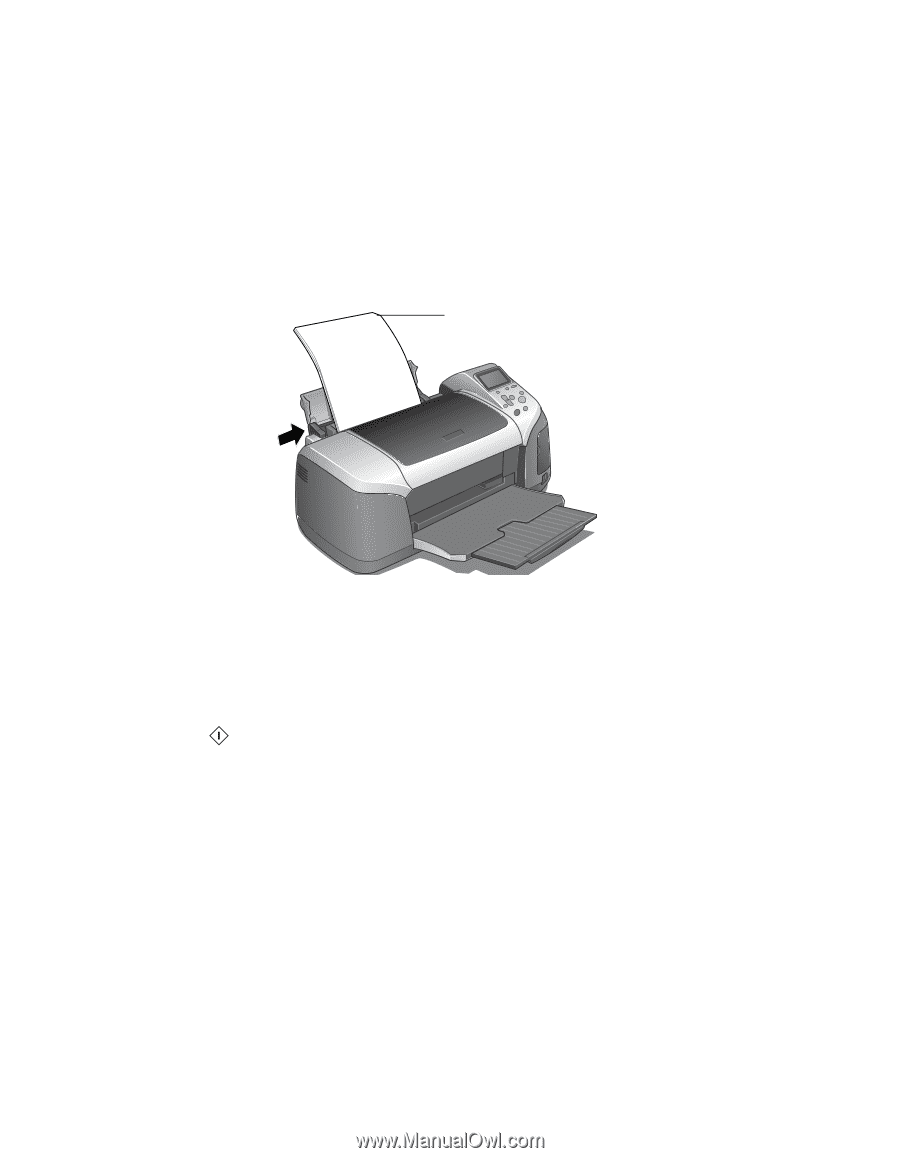
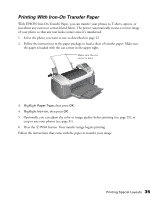
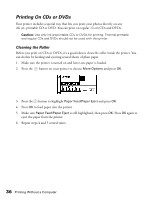
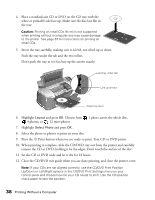
Printing With Iron-On Transfer Paper With EPSON Iron-On Transfer Paper, you can transfer your photos to T-shirts, aprons, or just about any cotton or cotton-blend fabric. The printer automatically creates a mirror-image of your photo so that any text looks correct once it's transferred. 1. Select the photo you want to use, as described on page 22. 2. Follow the instructions in the paper package to load a sheet of transfer paper. Make sure the paper is loaded with the cut corner in the upper right. Make sure the cut corner is here 3. Highlight Paper Type, then press OK. 4. Highlight Iron-on, then press OK. 5. Optionally, you can adjust the color or image quality before printing (see page 29), or crop or size your photos (see page 31). 6. Press the Print button. Your transfer image begins printing. Follow the instructions that came with the paper to transfer your image. Printing Special Layouts 35
-
 1
1 -
2
-
3
-
4
-
5
-
6
-
7
-
8
-
9
-
10
-
11
-
12
-
13
-
14
-
15
-
16
-
17
-
18
-
19
-
20
-
21
-
22
-
23
-
24
-
25
-
26
-
27
-
28
-
29
-
 30
30 -
 31
31 -
 32
32 -
 33
33 -
 34
34 -
 35
35 -
 36
36 -
 37
37 -
 38
38 -
 39
39 -
 40
40 -
41
-
42
-
43
-
44
-
45
-
46
-
47
-
48
-
49
-
50
-
51
-
52
-
53
-
54
-
55
-
56
-
57
-
58
-
59
-
60
-
61
-
62
-
63
-
64
-
65
-
66
-
67
-
68
-
69
-
70
-
71
-
72
-
73
-
74
-
75
-
76
-
77
-
78
-
79
-
80
-
81
-
82
-
83
-
84
-
85
-
86
-
87
-
88
-
89
-
90
-
91
-
92
-
93
-
94
-
95
-
96
-
97
-
98
-
99
-
100
-
101
-
102
-
103
-
104
-
105
-
106
-
107
-
108
-
109
-
110
-
111
-
112
-
113
-
114
-
115
-
116
-
117
-
118
-
119
-
120
-
121
-
122
-
123
-
124
 |
 |