Epson Stylus CX4600 Quick Reference Guide - Page 28
your scanned image opens in your application window., If you opened EPSON Scan from
 |
View all Epson Stylus CX4600 manuals
Add to My Manuals
Save this manual to your list of manuals |
Page 28 highlights
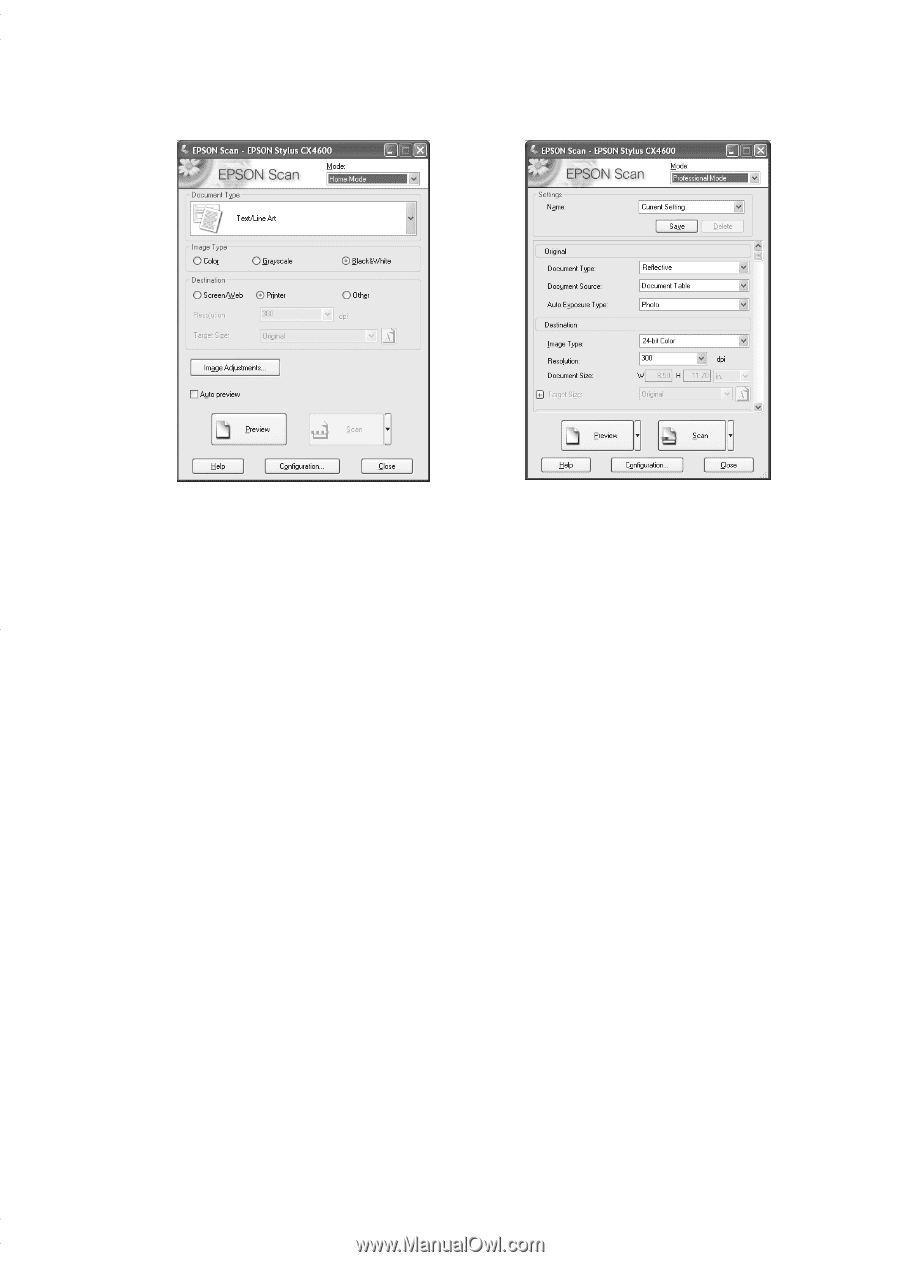
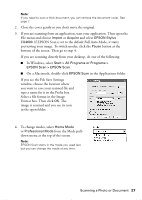
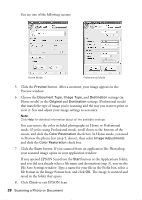
You see one of the following screens: Home Mode Professional Mode 5. Click the Preview button. After a moment, your image appears in the Preview window. 6. Choose the Document Type, Image Type, and Destination settings (in Home mode) or the Original and Destination settings (Professional mode) that match the type of image you're scanning and the way you want to print or view it. Size and adjust your image settings as necessary. Note: Click Help for detailed information about all the available settings. You can restore the color in faded photographs in Home or Professional mode. If you're using Professional mode, scroll down to the bottom of the screen, and click the Color Restoration check box. In Home mode, you need to Preview the photo first (step 5, above), then select Image Adjustments and click the Color Restoration check box. 7. Click the Scan button. If you scanned from an application like Photoshop, your scanned image opens in your application window. If you opened EPSON Scan from the Start button or the Applications folder, and you did not already select a file name and destination (step 3), you see the File Save Settings window. Type a name for your file in the Prefix box, select a file format in the Image Format box, and click OK. The image is scanned and saved in the folder that opens. 8. Click Close to exit EPSON Scan. 28 Scanning a Photo or Document
-
 1
1 -
2
-
3
-
4
-
5
-
6
-
7
-
8
-
9
-
10
-
11
-
12
-
13
-
14
-
15
-
16
-
17
-
18
-
19
-
20
-
21
-
22
-
 23
23 -
 24
24 -
 25
25 -
 26
26 -
 27
27 -
 28
28 -
 29
29 -
 30
30 -
 31
31 -
 32
32 -
 33
33 -
34
-
35
-
36
-
37
-
38
-
39
-
40
-
41
-
42
-
43
-
44
-
45
-
46
-
47
-
48
 |
 |