Epson Stylus Pro 7700 User's Guide - Page 49
Installing the Software for Windows
 |
View all Epson Stylus Pro 7700 manuals
Add to My Manuals
Save this manual to your list of manuals |
Page 49 highlights
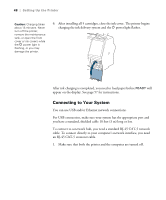
Setting Up the Printer | 49 2. Plug the interface cable into the appropriate port on the printer. USB connection Network connection 3. Plug the other end of the cable into the appropriate connector on your computer, or network switch or hub. Note: With Windows 7 or Vista, if you see the AutoPlay window, click Run Epsetup.exe. When you see the User Account Control screen, click Yes or Continue. Installing the Software for Windows Follow these steps to install the software for Windows: 1. Make sure your printer is turned off. 2. Turn on your computer. 3. Insert the printer software CD-ROM in your computer. The installer starts automatically. 49
-
 1
1 -
2
-
3
-
4
-
5
-
6
-
7
-
8
-
9
-
10
-
11
-
12
-
13
-
14
-
15
-
16
-
17
-
18
-
19
-
20
-
21
-
22
-
23
-
24
-
25
-
26
-
27
-
28
-
29
-
30
-
31
-
32
-
33
-
34
-
35
-
36
-
37
-
38
-
39
-
40
-
41
-
42
-
43
-
 44
44 -
 45
45 -
 46
46 -
 47
47 -
 48
48 -
 49
49 -
 50
50 -
 51
51 -
 52
52 -
 53
53 -
 54
54 -
55
-
56
-
57
-
58
-
59
-
60
-
61
-
62
-
63
-
64
-
65
-
66
-
67
-
68
-
69
-
70
-
71
-
72
-
73
-
74
-
75
-
76
-
77
-
78
-
79
-
80
-
81
-
82
-
83
-
84
-
85
-
86
-
87
-
88
-
89
-
90
-
91
-
92
-
93
-
94
-
95
-
96
-
97
-
98
-
99
-
100
-
101
-
102
-
103
-
104
-
105
-
106
-
107
-
108
-
109
-
110
-
111
-
112
-
113
-
114
-
115
-
116
-
117
-
118
-
119
-
120
-
121
-
122
-
123
-
124
-
125
-
126
-
127
-
128
-
129
-
130
-
131
-
132
-
133
-
134
-
135
-
136
-
137
-
138
-
139
-
140
-
141
-
142
-
143
-
144
-
145
-
146
-
147
-
148
-
149
-
150
-
151
-
152
-
153
-
154
-
155
-
156
-
157
-
158
-
159
-
160
-
161
-
162
-
163
-
164
-
165
-
166
-
167
-
168
-
169
-
170
-
171
-
172
-
173
-
174
-
175
-
176
-
177
-
178
-
179
-
180
-
181
-
182
-
183
-
184
-
185
-
186
-
187
-
188
-
189
-
190
-
191
-
192
-
193
-
194
-
195
-
196
-
197
-
198
-
199
-
200
-
201
-
202
-
203
-
204
-
205
-
206
-
207
-
208
-
209
-
210
-
211
-
212
-
213
-
214
-
215
-
216
-
217
-
218
-
219
-
220
-
221
-
222
-
223
-
224
-
225
-
226
-
227
-
228
 |
 |
49
Setting Up the Printer
|
49
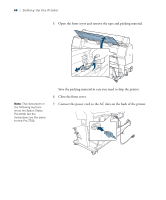
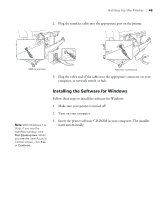
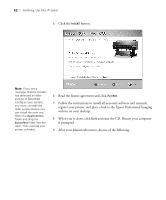
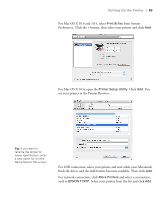
2.
Plug the interface cable into the appropriate port on the printer.
3.
Plug the other end of the cable into the appropriate connector on your
computer, or network switch or hub.
Installing the Software for Windows
Follow these steps to install the software for Windows:
1.
Make sure your printer is turned off.
2.
Turn on your computer.
3.
Insert the printer software CD-ROM in your computer. The installer
starts automatically.
Network connection
USB connection
Note:
With Windows 7 or
Vista, if you see the
AutoPlay window, click
Run Epsetup.exe
. When
you see the User Account
Control screen, click
Yes
or
Continue
.