Epson Stylus Pro GS6000 Setup and User's Guide - Page 45
At the back of the printer, carefully feed the roll media into the slot and, printer
 |
View all Epson Stylus Pro GS6000 manuals
Add to My Manuals
Save this manual to your list of manuals |
Page 45 highlights
Handling Media and Printouts | 45 6. To center the roll, release both roll holder levers, move the center of the roll to the d mark on the printer, and flip the levers all the way down. Center mark 7. Open the front cover. 8. At the back of the printer, carefully feed the roll media into the slot and beneath the guides. Feed it all the way through to the front of the printer, keeping the roll tightly wound. 45
-
 1
1 -
2
-
3
-
4
-
5
-
6
-
7
-
8
-
9
-
10
-
11
-
12
-
13
-
14
-
15
-
16
-
17
-
18
-
19
-
20
-
21
-
22
-
23
-
24
-
25
-
26
-
27
-
28
-
29
-
30
-
31
-
32
-
33
-
34
-
35
-
36
-
37
-
38
-
39
-
 40
40 -
 41
41 -
 42
42 -
 43
43 -
 44
44 -
 45
45 -
 46
46 -
 47
47 -
 48
48 -
 49
49 -
 50
50 -
51
-
52
-
53
-
54
-
55
-
56
-
57
-
58
-
59
-
60
-
61
-
62
-
63
-
64
-
65
-
66
-
67
-
68
-
69
-
70
-
71
-
72
-
73
-
74
-
75
-
76
-
77
-
78
-
79
-
80
-
81
-
82
-
83
-
84
-
85
-
86
-
87
-
88
-
89
-
90
-
91
-
92
-
93
-
94
-
95
-
96
-
97
-
98
-
99
-
100
-
101
-
102
-
103
-
104
-
105
-
106
-
107
-
108
-
109
-
110
-
111
-
112
-
113
-
114
-
115
-
116
-
117
-
118
-
119
-
120
-
121
-
122
-
123
-
124
-
125
-
126
-
127
-
128
 |
 |
45
Handling Media and Printouts
|
45
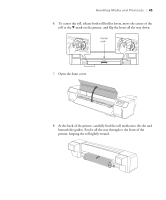
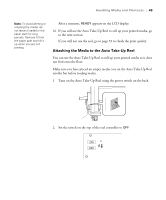
6.
To center the roll, release both roll holder levers, move the center of the
roll to the
d
mark on the printer, and flip the levers all the way down.
7.
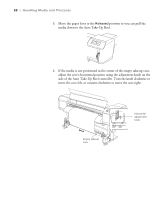
Open the front cover.
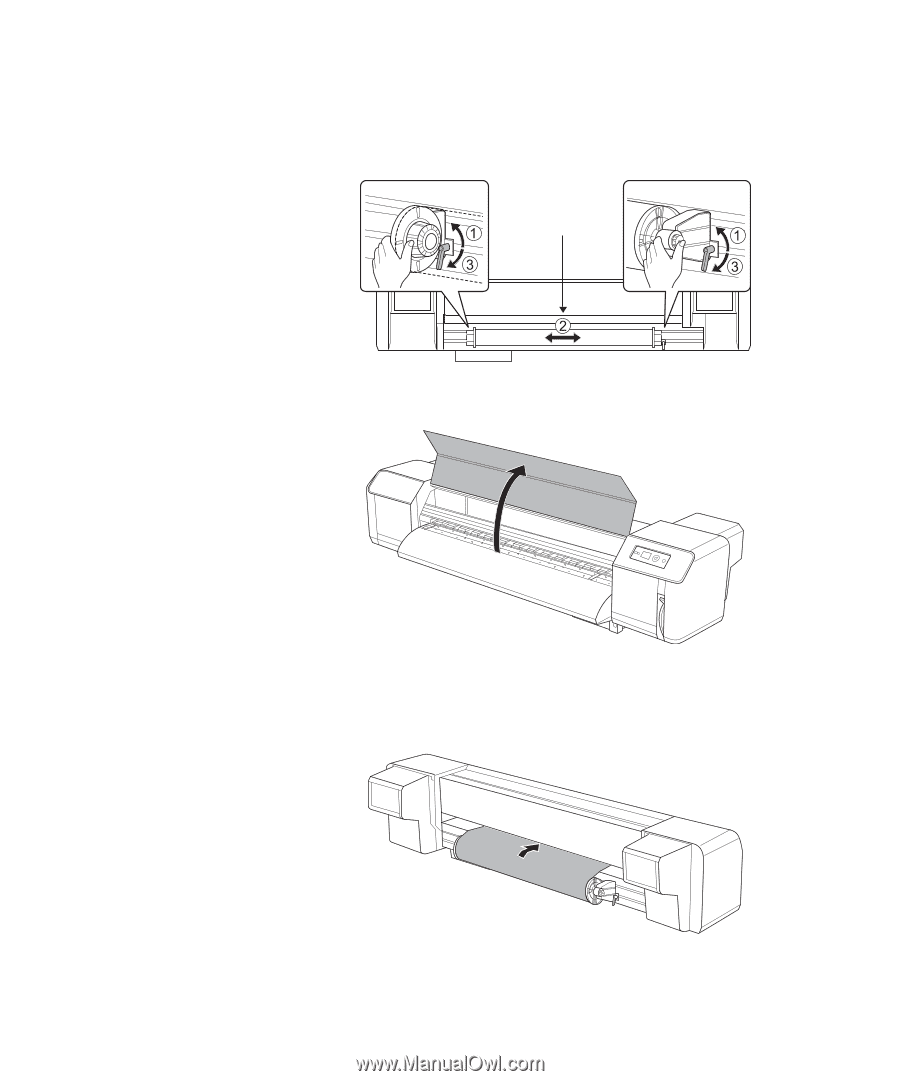
8.
At the back of the printer, carefully feed the roll media into the slot and
beneath the guides. Feed it all the way through to the front of the
printer, keeping the roll tightly wound.
Center
mark