Epson SureColor S50670 Setup Guide - Page 14
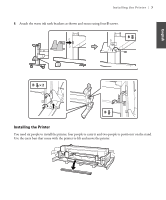
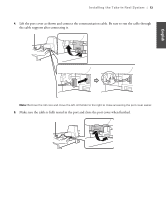
Run the communication cable that is attached to the printer through the cable supports as shown.
 |
View all Epson SureColor S50670 manuals
Add to My Manuals
Save this manual to your list of manuals |
Page 14 highlights
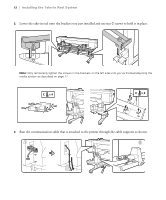
12 | Installing the Take-in Reel System 2. Lower the take-in reel onto the brackets you just installed and use size C screws to hold it in place. Note: Only temporarily tighten the screws in the brackets on the left side until you've finished adjusting the media system as described on page 17. 3. Run the communication cable that is attached to the printer through the cable supports as shown.
-
 1
1 -
2
-
3
-
4
-
5
-
6
-
7
-
8
-
 9
9 -
 10
10 -
 11
11 -
 12
12 -
 13
13 -
 14
14 -
 15
15 -
 16
16 -
 17
17 -
 18
18 -
 19
19 -
20
-
21
-
22
-
23
-
24
-
25
-
26
-
27
-
28
-
29
-
30
-
31
-
32
-
33
-
34
-
35
-
36
-
37
-
38
-
39
-
40
-
41
-
42
-
43
-
44
-
45
-
46
-
47
-
48
-
49
-
50
-
51
-
52
-
53
-
54
-
55
-
56
-
57
-
58
-
59
-
60
-
61
-
62
-
63
-
64
-
65
-
66
-
67
-
68
-
69
-
70
-
71
-
72
-
73
-
74
-
75
-
76
-
77
-
78
-
79
-
80
-
81
-
82
-
83
-
84
-
85
-
86
-
87
-
88
-
89
-
90
-
91
-
92
-
93
-
94
-
95
-
96
-
97
-
98
-
99
-
100
-
101
-
102
 |
 |
12
|
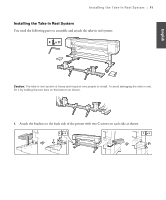
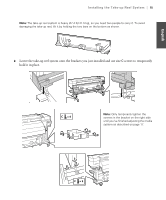
Installing the Take-in Reel System
2.
Lower the take-in reel onto the brackets you just installed and use size
C
screws to hold it in place.
Note:
Only temporarily tighten the screws in the brackets on the left side until you’ve finished adjusting the
media system as described on page 17.
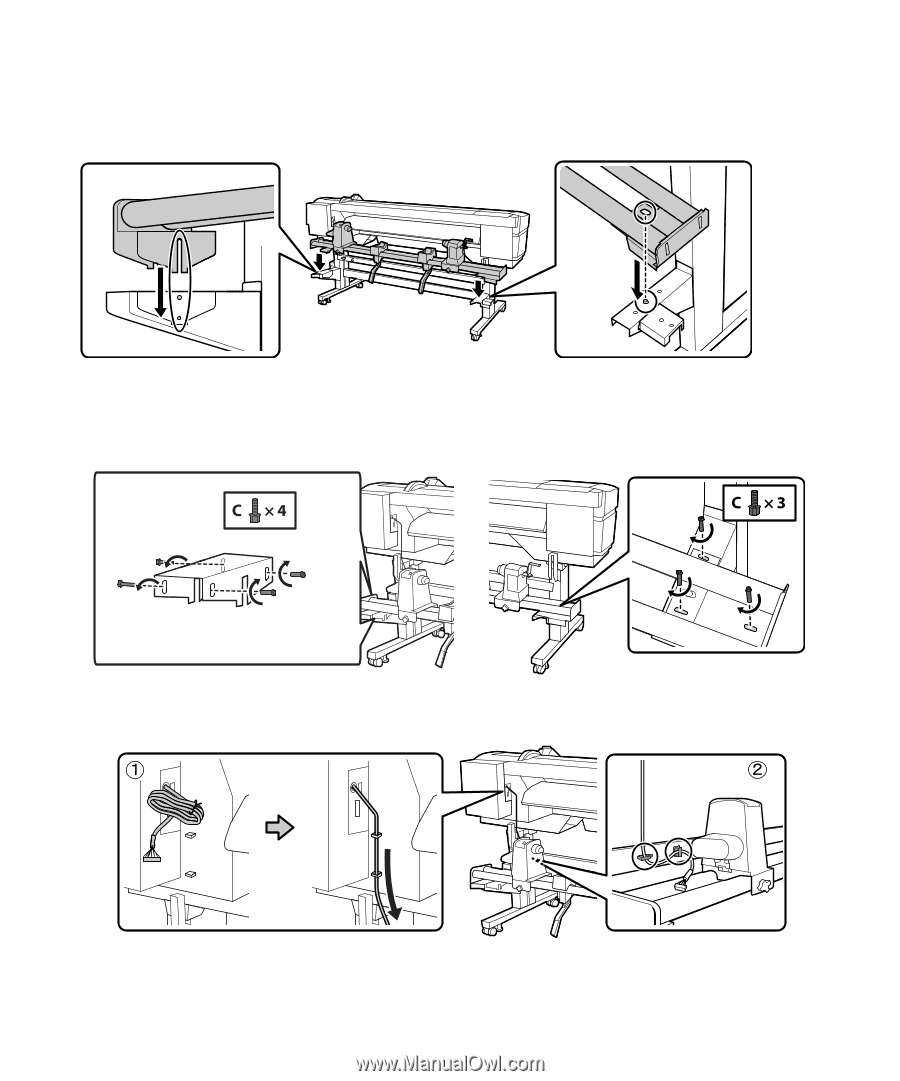
3.
Run the communication cable that is attached to the printer through the cable supports as shown.