Epson SureColor S50670 Setup Guide - Page 20
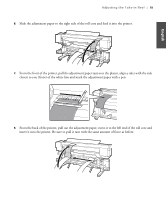
Adjusting the Take-in Reel, Move the right roll holder over to hold the roll core in place
 |
View all Epson SureColor S50670 manuals
Add to My Manuals
Save this manual to your list of manuals |
Page 20 highlights
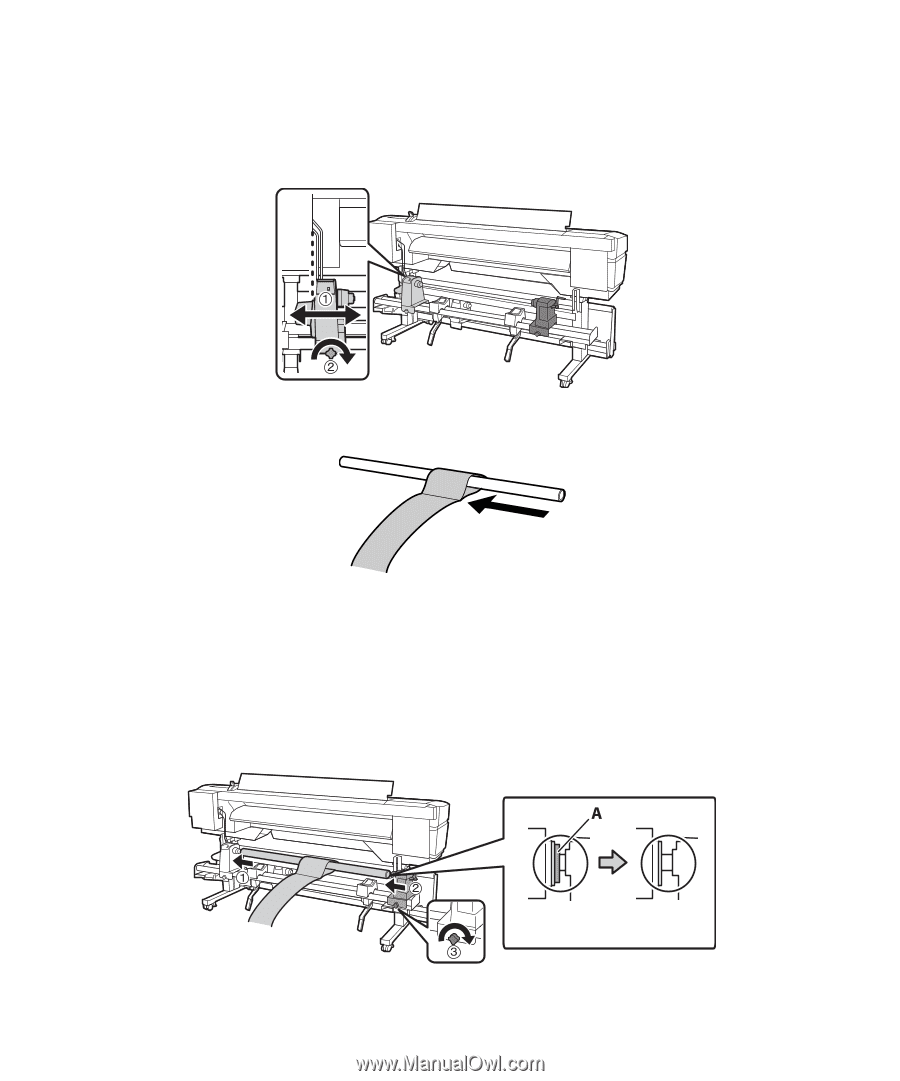
18 | Adjusting the Take-in Reel 3. Align the left side of the roll holder with the left side of the opening of the printer as shown, then tighten the roll holder fixing screw to secure it in place. 4. Slide the included roll core into the loop at the end of the adjustment paper. 5. Load the roll core with the adjustment paper into the roll holder: • Place the core on the left roll holder. • Move the right roll holder over to hold the roll core in place, then turn the roll holder screw on the right to lock it into place. • Turn the crank until part A is hidden as shown below.
-
 1
1 -
2
-
3
-
4
-
5
-
6
-
7
-
8
-
9
-
10
-
11
-
12
-
13
-
14
-
 15
15 -
 16
16 -
 17
17 -
 18
18 -
 19
19 -
 20
20 -
 21
21 -
 22
22 -
 23
23 -
 24
24 -
 25
25 -
26
-
27
-
28
-
29
-
30
-
31
-
32
-
33
-
34
-
35
-
36
-
37
-
38
-
39
-
40
-
41
-
42
-
43
-
44
-
45
-
46
-
47
-
48
-
49
-
50
-
51
-
52
-
53
-
54
-
55
-
56
-
57
-
58
-
59
-
60
-
61
-
62
-
63
-
64
-
65
-
66
-
67
-
68
-
69
-
70
-
71
-
72
-
73
-
74
-
75
-
76
-
77
-
78
-
79
-
80
-
81
-
82
-
83
-
84
-
85
-
86
-
87
-
88
-
89
-
90
-
91
-
92
-
93
-
94
-
95
-
96
-
97
-
98
-
99
-
100
-
101
-
102
 |
 |
18
|
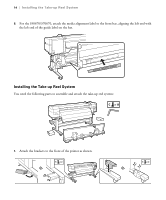
Adjusting the Take-in Reel
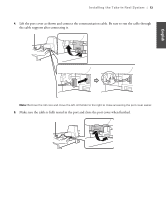
3.
Align the left side of the roll holder with the left side of the opening of the printer as shown, then
tighten the roll holder fixing screw to secure it in place.
4.
Slide the included roll core into the loop at the end of the adjustment paper.
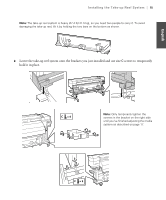
5.
Load the roll core with the adjustment paper into the roll holder:
•
Place the core on the left roll holder.
•
Move the right roll holder over to hold the roll core in place, then turn the roll holder screw on
the right to lock it into place.
•
Turn the crank until part
A
is hidden as shown below.