Epson T-1000 User Manual - Page 13
Installing and Replacing the Ribbon, CAUTION - ink cartridge
 |
View all Epson T-1000 manuals
Add to My Manuals
Save this manual to your list of manuals |
Page 13 highlights
Installing and Replacing the Ribbon The printer uses a continuous-loop, inked fabric ribbon. It is enclosed in a cartridge that makes ribbon installation and replacement a clean and easy job. To install the ribbon, follow these steps: 1. Remove the lid at the front of the printer by lifting the handles. Removing the lid enables you to see the print head, which is shown below. CAUTION: The power must be off when you move the print head because moving the print head when the power is on may damage your printer. Also, if you've been using your printer, be careful not to touch the print head because it becomes hot during use. Let it cool for a few minutes. 1-6 Setting Up
-
 1
1 -
2
-
3
-
4
-
5
-
6
-
7
-
 8
8 -
 9
9 -
 10
10 -
 11
11 -
 12
12 -
 13
13 -
 14
14 -
 15
15 -
 16
16 -
 17
17 -
 18
18 -
19
-
20
-
21
-
22
-
23
-
24
-
25
-
26
-
27
-
28
-
29
-
30
-
31
-
32
-
33
-
34
-
35
-
36
-
37
-
38
-
39
-
40
-
41
-
42
-
43
-
44
-
45
-
46
-
47
-
48
-
49
-
50
-
51
-
52
-
53
-
54
-
55
-
56
-
57
-
58
-
59
-
60
-
61
-
62
-
63
-
64
-
65
-
66
-
67
-
68
-
69
-
70
-
71
-
72
-
73
-
74
-
75
-
76
-
77
-
78
-
79
-
80
-
81
-
82
-
83
-
84
-
85
-
86
-
87
-
88
-
89
-
90
-
91
-
92
-
93
-
94
 |
 |

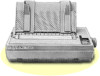
Installing and Replacing the Ribbon
The printer uses a continuous-loop, inked fabric ribbon. It is enclosed in
a cartridge that makes ribbon installation and replacement a clean and
easy job.
To install the ribbon, follow these steps:
1.
Remove the lid at the front of the printer by lifting the handles.
Removing the lid enables you to see the print head, which is shown
below.
CAUTION:
The power must be off when you move the print
head because moving the print head when the power is on
may damage your printer. Also, if you’ve been using your
printer, be careful not to touch the print head because it
becomes hot during use. Let it cool for a few minutes.
1-6
Setting Up