Epson T-1000 User Manual - Page 77
Installing an Interface, WARNING
 |
View all Epson T-1000 manuals
Add to My Manuals
Save this manual to your list of manuals |
Page 77 highlights
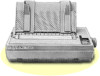
Installing an Interface Before installing an interface, you must remove the printer's cover. WARNING: Do not remove the cover unless the printer is turned OFF and unplugged because high voltages are present inside the printer when the power is on. Also, do not touch contacts on the circuit board of the printer because many of the components can be destroyed by the static electricity charge that may build up on your body. 1. Turn off the power to both the printer and the computer and unplug the power cable and disconnect the interface cable from the printer. 2. Remove the printer lid, tractor unit (if installed), paper rest (if installed), and paper guide. 3. Remove the ribbon. 4. To remove the upper case of the printer, insert a flat-blade screwdriver into each of the two holes at the front of the printer, as shown in the illustration. Gently twist the screwdriver while pushing it up until the upper case is loosened from the bottom. Appendix A-3
-
 1
1 -
2
-
3
-
4
-
5
-
6
-
7
-
8
-
9
-
10
-
11
-
12
-
13
-
14
-
15
-
16
-
17
-
18
-
19
-
20
-
21
-
22
-
23
-
24
-
25
-
26
-
27
-
28
-
29
-
30
-
31
-
32
-
33
-
34
-
35
-
36
-
37
-
38
-
39
-
40
-
41
-
42
-
43
-
44
-
45
-
46
-
47
-
48
-
49
-
50
-
51
-
52
-
53
-
54
-
55
-
56
-
57
-
58
-
59
-
60
-
61
-
62
-
63
-
64
-
65
-
66
-
67
-
68
-
69
-
70
-
71
-
 72
72 -
 73
73 -
 74
74 -
 75
75 -
 76
76 -
 77
77 -
 78
78 -
 79
79 -
 80
80 -
 81
81 -
 82
82 -
83
-
84
-
85
-
86
-
87
-
88
-
89
-
90
-
91
-
92
-
93
-
94
 |
 |
