Epson T-1000 User Manual - Page 14
cartridge into the slots located inside the printer in the right and left - ribbon cartridge
 |
View all Epson T-1000 manuals
Add to My Manuals
Save this manual to your list of manuals |
Page 14 highlights
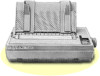
installing and Replacing the Ribbon 2. Move the print head by hand to the center of the printer so that the other parts of the printer will not get in your way. 3. Grasp the ribbon cartridge by its handle and hold the cartridge so that the exposed strip of ribbon is facing away from you. 4. Insert the cartridge by placing the black hooks on each side of the cartridge into the slots located inside the printer in the right and left front corners. Push down until the cartridge snaps into place. (See the illustration below.) Setting Up 1-7
-
 1
1 -
2
-
3
-
4
-
5
-
6
-
7
-
8
-
 9
9 -
 10
10 -
 11
11 -
 12
12 -
 13
13 -
 14
14 -
 15
15 -
 16
16 -
 17
17 -
 18
18 -
 19
19 -
20
-
21
-
22
-
23
-
24
-
25
-
26
-
27
-
28
-
29
-
30
-
31
-
32
-
33
-
34
-
35
-
36
-
37
-
38
-
39
-
40
-
41
-
42
-
43
-
44
-
45
-
46
-
47
-
48
-
49
-
50
-
51
-
52
-
53
-
54
-
55
-
56
-
57
-
58
-
59
-
60
-
61
-
62
-
63
-
64
-
65
-
66
-
67
-
68
-
69
-
70
-
71
-
72
-
73
-
74
-
75
-
76
-
77
-
78
-
79
-
80
-
81
-
82
-
83
-
84
-
85
-
86
-
87
-
88
-
89
-
90
-
91
-
92
-
93
-
94
 |
 |

installing and Replacing the Ribbon
2.
Move the print head by hand to the center of the printer so that the
other parts of the printer will not get in your way.
3.
Grasp the ribbon cartridge by its handle and hold the cartridge so
that the exposed strip of ribbon is facing away from you.
4.
Insert the cartridge by placing the black hooks on each side of the
cartridge into the slots located inside the printer in the right and left
front corners. Push down until the cartridge snaps into place. (See
the illustration below.)
Setting Up
1-7