Foscam FI8910W USER MANUAL_1 - Page 8

Hardware Installation, 2 Surveillance Software GUI - manual
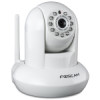
Page 8 highlights

Mounting Port Port for mounting bracket. www.foscam.us Reset button 1) Press and hold down the RESET BUTTON about 10 seconds. when released the IP camera will be reset back to factory default settings. You must power on the camera before reset. 2) Press and hold down the RESET BUTTON about 4 seconds, then press the WPS button on the router, then you can use the WPS function. (For more details: please read Wireless Settings in the User Manual). 1.5 Hardware Installation Step 1: Fix the bracket on the wall with 2 screws. We have provided the screws in package. Step2: Adjust the bracket to make the camera facing to the monitoring area. Step3: Manually tighten the screws to lock the camera and the bracket. 2 Surveillance Software GUI Please refer to the Quick Installation Guide if you install the camera at first time. After finishing Foscam Digital Technologies LLC Telephone: 1-800-930-0949 7

  • 1
  • 2
  • 3
  • 4
  • 5
  • 6
  • 7
  • 8
  • 9
  • 10
  • 11
  • 12
  • 13
  • 14
  • 15
  • 16
  • 17
  • 18
  • 19
  • 20
  • 21
  • 22
  • 23
  • 24
  • 25
  • 26
  • 27
  • 28
  • 29
  • 30
  • 31
  • 32
  • 33
  • 34
  • 35
  • 36
  • 37
  • 38
  • 39
  • 40
  • 41
  • 42
  • 43
  • 44
  • 45
  • 46
  • 47
  • 48
  • 49
  • 50
  • 51
  • 52
  • 53
  • 54
  • 55
  • 56
  • 57
  • 58
  • 59
  • 60
  • 61
  • 62
  • 63
  • 64
  • 65

www
www
.foscam.
.foscam.
us
us
Foscam Digital Technologies LLC
Telephone: 1-800-930-0949
7
Mounting Port
Port for mounting bracket.
Reset button
1) Press and hold down the RESET BUTTON about 10 seconds. when released the IP camera
will be reset back to factory default settings. You must power on the camera before reset.
2) Press and hold down the RESET BUTTON about 4 seconds, then press the WPS button on
the router, then you can use the WPS function. (For more details: please read Wireless Settings
in the User Manual).
1.5 Hardware Installation
Step 1: Fix the bracket on the wall with 2 screws. We have provided the screws in package.
Step2: Adjust the bracket to make the camera facing to the monitoring area.
Step3: Manually tighten the screws to lock the camera and the bracket.
2 Surveillance Software GUI
Please refer to the Quick Installation Guide if you install the camera at first time. After finishing