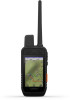
Garmin Alpha 200i Owners Manual - Page 12
Testing the Device, Connected Features
 |
View all Garmin Alpha 200i manuals
Add to My Manuals
Save this manual to your list of manuals |
Page 12 highlights
2 Hold the SOS button. 3 Wait for the SOS countdown. The device sends a default message to the emergency response service with details about your location. 4 Reply to the confirmation message from the emergency response service. Your reply lets the emergency response service know that you are capable of interacting with them during the rescue. If you do not reply, the emergency response service will still initiate a rescue. For the first 10 minutes of your rescue, an updated location is sent to the emergency response service every minute. To conserve battery power after the first 10 minutes, an updated location is sent every 10 minutes when moving, and every 30 minutes when stationary. Sending a Custom SOS Message After pressing the SOS button to initiate an SOS rescue, you can reply with a custom message using the SOS page. 1 Select inReach > SOS > Reply. 2 Select Type Message to compose a custom SOS message. 3 Select Send Message. Your reply lets the emergency response service know that you are capable of interacting with them during the rescue. Canceling an SOS Rescue If you no longer need assistance, you can cancel an SOS rescue after it is sent to the emergency response service. 1 Lift the protective cap, and hold the SOS button. 2 Select Cancel SOS. 3 When prompted to confirm your cancellation request, select Cancel SOS. Your device transmits the cancellation request. When you receive a confirmation message from the emergency response service, the device returns to normal operation. Weather Your device can receive weather information. inReach Weather: You can receive weather information through your inReach subscription. Your device can send an inReach message to request basic, premium, or marine weather forecasts. You can receive weather forecasts for your current location, a waypoint, GPS coordinates, or a location you choose on the map. Requesting an inReach Weather Forecast For the best results, you should ensure your device has a clear view of the sky when you request an inReach weather forecast. Your device can send a message to request a basic, premium, or marine weather forecast using your inReach subscription. You can receive weather forecasts for your current location, a waypoint, GPS coordinates, or a location you choose on the map. Weather forecasts incur data charges or additional charges on your inReach subscription. 1 Select inReach > inReach Weather > New Forecast. 2 If necessary, select Forecast Type, and select a Basic or Premium weather forecast. 3 If necessary, select Location, and select a location. By default, the device requests weather for your current location. 4 If necessary, select Marine to request a marine weather forecast. NOTE: For best results, you should only request a marine forecast for a location away from shore and over a large body of water. Marine forecasts are not available for land locations or inland lakes. 5 Select Get Forecast. The device sends a request for the forecast. It may take several minutes to receive the weather forecast data. After the device finishes downloading the data, you can view the forecast at any time until all the information in the forecast has expired. You can also update the forecast at any time. Updating an inReach Weather Forecast You can update an inReach weather forecast that has expired or contains outdated information. Updating a forecast incurs the same data charges or additional charges as requesting a forecast. 1 Select inReach > inReach Weather. 2 Select a location with an outdated weather forecast. 3 Select Update Forecast. The device requests an updated forecast. If you update the My Location forecast, the device requests an updated forecast for your current location. It may take several minutes to receive the updated weather forecast data. Deleting an inReach Weather Forecast You can delete an expired forecast or a forecast for a location that you no longer need. 1 Select inReach > inReach Weather. 2 Select a weather location. NOTE: You cannot delete the My Location forecast. 3 Select > Delete. Testing the Device CAUTION You should test the device outdoors before using it on a trip to ensure your satellite subscription is active. Select inReach > inReach Utilities > > Test. Wait while the device sends a test message. When you receive a confirmation message, your device is ready to use. Connected Features Connected features are available for your Alpha device when you connect the device to a wireless network or a compatible smartphone using Bluetooth® technology. Some features require you to install the Garmin Explore app on your smartphone. Go to garmin.com/apps for more information. BirdsEye imagery: Allows you to download BirdsEye Satellite Imagery directly to your device when connected to a Wi‑Fi® network. Garmin Explore: The Garmin Explore app syncs and shares waypoints, tracks, and routes with your device. You can also download maps to your smartphone for offline access. 8 Testing the Device
-
 1
1 -
2
-
3
-
4
-
5
-
6
-
 7
7 -
 8
8 -
 9
9 -
 10
10 -
 11
11 -
 12
12 -
 13
13 -
 14
14 -
 15
15 -
 16
16 -
 17
17 -
18
-
19
-
20
-
21
-
22
-
23
-
24
-
25
-
26
-
27
-
28
 |
 |
