Garmin eTrex SE Owners Manual - Page 10
Changing the Dashboard, Customizing the Data Fields
 |
View all Garmin eTrex SE manuals
Add to My Manuals
Save this manual to your list of manuals |
Page 10 highlights
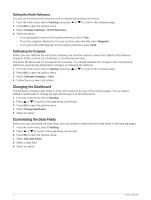
Setting the North Reference You can set the directional reference used in calculating heading information. 1 From the main menu, select Tracking, and press or to scroll to the compass page. 2 Press OK to open the options menu. 3 Select Compass Settings > North Reference. 4 Select an option: • To set geographic north as the heading reference, select True. • To set the magnetic declination for your location automatically, select Magnetic. • To set grid north (000 degrees) as the heading reference, select Grid. Calibrating the Compass Before you can calibrate the electronic compass, you must be outdoors, away from objects that influence magnetic fields, such as cars, buildings, or overhead power lines. The eTrex SE device has a 3-axis electronic compass. You should calibrate the compass after moving long distances, experiencing temperature changes, or changing the batteries. 1 From the main menu, select Tracking, and press or to scroll to the compass page. 2 Press OK to open the options menu. 3 Select Calibrate Compass > Start. 4 Follow the on-screen instructions. Changing the Dashboard The dashboard displays data fields or other information at the top of the tracking pages. You can select different dashboards to change the type and the layout of the information. 1 From the main menu, select Tracking. 2 Press or to scroll to the page being customized. 3 Press OK to open the options menu. 4 Select Change Dashboard. 5 Select an option. Customizing the Data Fields Before you can customize the data fields, you must enable a dashboard with data fields on the tracking pages. 1 From the main menu, select Tracking. 2 Press or to scroll to the page being customized. 3 Press OK to open the options menu. 4 Select Edit Data Fields. 5 Select a data field. 6 Select an option. 6 Tracking Pages
-
 1
1 -
2
-
3
-
4
-
 5
5 -
 6
6 -
 7
7 -
 8
8 -
 9
9 -
 10
10 -
 11
11 -
 12
12 -
 13
13 -
 14
14 -
 15
15 -
16
-
17
-
18
-
19
-
20
-
21
-
22
-
23
-
24
-
25
-
26
-
27
-
28
-
29
-
30
 |
 |