Garmin eTrex SE Owners Manual - Page 9
Navigating with the Compass
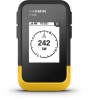 |
View all Garmin eTrex SE manuals
Add to My Manuals
Save this manual to your list of manuals |
Page 9 highlights
Changing the Map Orientation 1 From the main menu, select Tracking, and press or to scroll to the map page. 2 Press OK to open the options menu. 3 Select Map Settings > Orientation. 4 Select an option: • Select North Up to show north at the top of the page. • Select Track Up to show your current direction of travel at the top of the page. Navigating with the Compass When navigating to a destination, points to your destination, regardless of the direction you are moving. 1 Begin navigating to a destination (Navigating to a Destination, page 12). 2 From the main menu, select Tracking, and press or to scroll to the compass page. 3 Turn until points toward the top of the compass, and continue moving in that direction to the destination. Using the Course Pointer The course pointer is most useful when you are navigating to your destination in a straight line, such as when you are navigating on water. It can help you navigate back to the course line when you go off-course to avoid obstacles or hazards. 1 From the main menu, select Tracking, and press or to scroll to the compass page. 2 Press OK to open the options menu. 3 Select Compass Settings > Pointer > Course (CDI) to enable the course pointer. Course line pointer. Indicates the direction of the desired course line from your starting point to your next waypoint. Course deviation indicator (CDI). Indicates the location of the desired course line in relation to your location. If the CDI is aligned with the course line pointer, you are on course. Course deviation distance. The dots indicate your distance off course. The distance represented by each dot is indicated by the scale in the upper-right corner. To-and-from indicator. Indicates whether you are past the next waypoint. Tracking Pages 5
-
 1
1 -
2
-
3
-
 4
4 -
 5
5 -
 6
6 -
 7
7 -
 8
8 -
 9
9 -
 10
10 -
 11
11 -
 12
12 -
 13
13 -
 14
14 -
15
-
16
-
17
-
18
-
19
-
20
-
21
-
22
-
23
-
24
-
25
-
26
-
27
-
28
-
29
-
30
 |
 |
