Gigabyte GA-8I945P-G Manual - Page 14
Setup Array for Normal
 |
View all Gigabyte GA-8I945P-G manuals
Add to My Manuals
Save this manual to your list of manuals |
Page 14 highlights
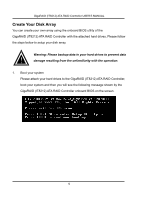
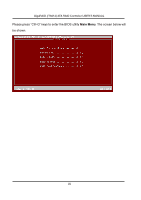
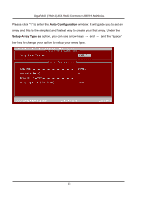
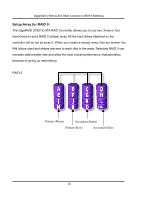
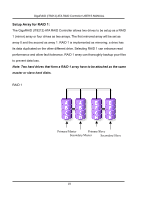
GigaRAID (IT8212) ATA RAID Controller USER'S MANUAL Setup Array for Normal: You can use the GigaRAID (IT8212) ATA RAID Controller as a normal IDE controller. The GigaRAID (IT8212) ATA RAID Controller allows you to use one, two, three or four hard drives. All the hard drives attached on the GigaRAID (IT8212) ATA RAID Controller are left to act as independent drive volumes. Please follow the procedures below to set an array: Use the "space" bar key to select a RAID type. Press "Ctrl-Y" keys to save and create an array. If you select RAID 0, 1, 0+1 or JBOD, the boot sector of the new created array will be erased. If you select Normal, the boot sector will be remained. Warning: If you prefer to keep data in your hard drives, please ! follow the procedures in Define RAID section on page 22 to setup your arrays manually. Click the "Esc" key to go back to the Main Menu on page 10. Click the "Esc" key to quit BIOS and boot. You need to FDISK and format your new array. The new array will be regarded as a new hard drive by the system. 14
-
 1
1 -
2
-
3
-
4
-
5
-
6
-
7
-
8
-
 9
9 -
 10
10 -
 11
11 -
 12
12 -
 13
13 -
 14
14 -
 15
15 -
 16
16 -
 17
17 -
 18
18 -
 19
19 -
20
-
21
-
22
-
23
-
24
-
25
-
26
-
27
-
28
-
29
-
30
-
31
-
32
-
33
-
34
-
35
-
36
-
37
-
38
-
39
-
40
-
41
-
42
-
43
-
44
-
45
-
46
-
47
-
48
-
49
-
50
-
51
-
52
-
53
-
54
-
55
-
56
-
57
-
58
-
59
-
60
-
61
-
62
-
63
-
64
-
65
-
66
-
67
-
68
-
69
-
70
-
71
-
72
-
73
-
74
-
75
-
76
-
77
-
78
-
79
-
80
-
81
-
82
-
83
-
84
-
85
-
86
-
87
-
88
 |
 |