Gigabyte I1520N Manual - Page 29
How to Connect an HDMI Display, 4 Ethernet LAN Connection
 |
View all Gigabyte I1520N manuals
Add to My Manuals
Save this manual to your list of manuals |
Page 29 highlights
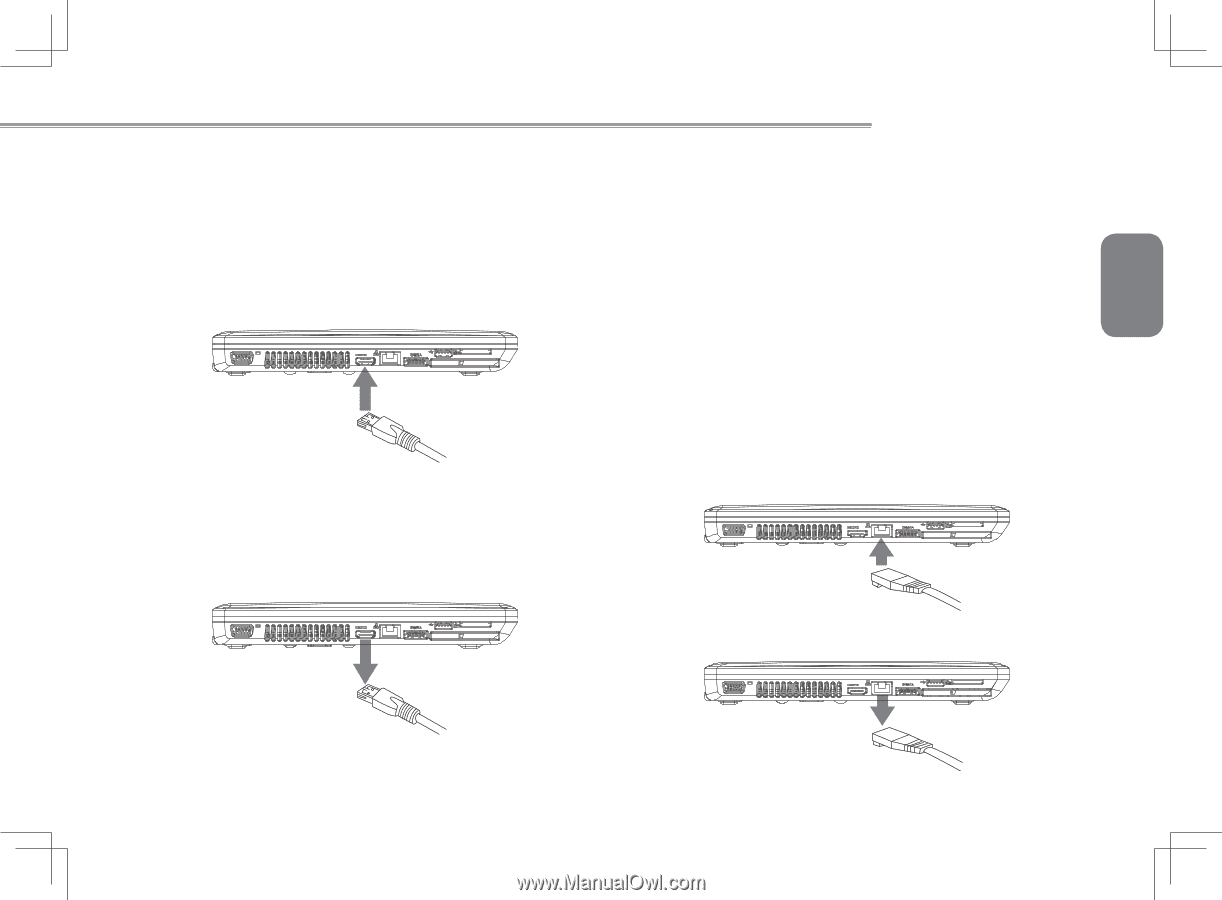
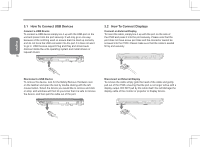
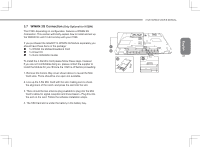
3.3 How to Connect an HDMI Display Connect an HDMI Display To insert the cable, simply line it up with the HDMI port on the i1520 unit and press it into the port securely. It will click lightly into place when it is inserted properly. Use the operating systems display properties to then get an image on the HDMI Output port. Depending on your configuration the HDMI port can also carry a sound signal. Disconnect an HDMI Display To remove the cable simply grab the head of the cable and gently pull out of the i1520, ensuring that the port is no longer active with a display output. DO NOT pull by the cable itself is this can damage the HDMI cable or the cables connector head as well as the HDMI port. i1520 SERIES USER'S MANUAL 3.4 Ethernet LAN Connection The i1520 features an RJ45 Ethernet port with an integrated LAN controller capable of operational speeds of 10Mbps, 100Mbps or Gigabit (1000Mbps), depending on configuration. English Ethernet LAN Connection The built-in LAN controller defaults to Auto Discovery when any LAN cable is connected and will be able to operate on a Peer 2 Peer basis. If the Notebook will be part of a domain, the controller and system settings will need to be configured to connect to the domain network. This will need to be done by the network administrator. 19 The connection speed will also be determined by the cable used and the network hardware that you connect to. For Gigabit (1000Base-T) a CAT5E (Category 5E) Cable is required For 100Mbps (100BASE-T) a CAT5 (Category 5) Cable is required To connect to a LAN, simply take the cable and align it, contacts facing down, and push it into the RJ45 LAN port until it clicks into place. To disconnect, simply push the clip arm down and pull the cable out of the port to remove it.
-
 1
1 -
2
-
3
-
4
-
5
-
6
-
7
-
8
-
9
-
10
-
11
-
12
-
13
-
14
-
15
-
16
-
17
-
18
-
19
-
20
-
21
-
22
-
23
-
 24
24 -
 25
25 -
 26
26 -
 27
27 -
 28
28 -
 29
29 -
 30
30 -
 31
31 -
 32
32 -
 33
33 -
 34
34 -
35
-
36
-
37
-
38
-
39
-
40
-
41
-
42
-
43
-
44
-
45
-
46
-
47
-
48
-
49
-
50
-
51
-
52
-
53
-
54
 |
 |