Harman Kardon 1000 Owners Manual - Page 22
Audio Setup, Video Setup
 |
View all Harman Kardon 1000 manuals
Add to My Manuals
Save this manual to your list of manuals |
Page 22 highlights
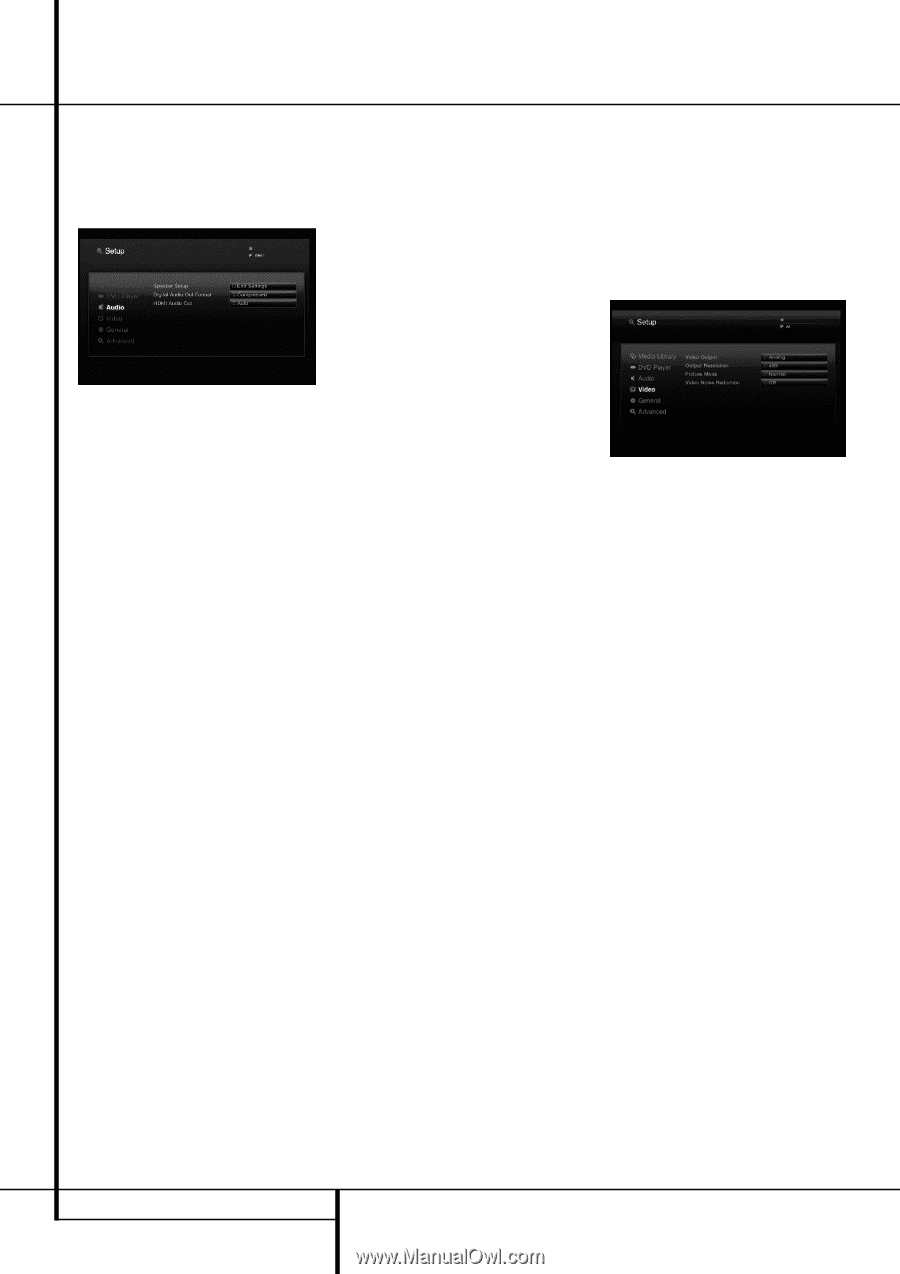
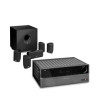
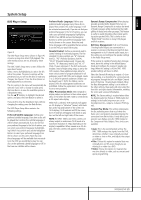
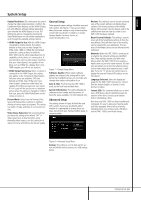
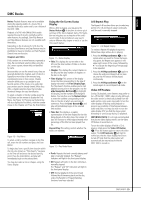
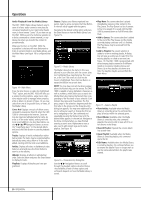
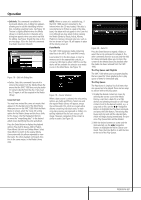
System Setup Audio Setup Each setting applies to a certain type of audio output, but only for Zone 1. The audio output to Zones 2, 3 and 4 is always full-range, 2-channel analog line level. Figure 5 - Audio Setup Menu Speaker Setup: A dialog box appears, allowing you to program the Speaker Size settings used with the Zone 1 (6-Channel) Analog Audio Outputs. The settings are dependent on the DVD Bass Management setting in the DVD Player Setup menu. • DVD Bass Management Bypass: This is the default system setting, and should be used when the receiver or processor is capable of performing bass management. Configure the speaker settings on the receiver. All main speakers default to the Large (full-range) setting, and the subwoofer is on. These settings may not be changed. • DVD Bass Management On: Use this setting if the receiver is not capable of performing bass management, to ensure that the low frequencies steered to each channel match the frequency-response capabilities of the speakers. I The default settings are Small (only frequencies of 200Hz and higher are passed) for all of the main speakers, and the subwoofer is on. I With the left and right speakers set to Large, the center speaker may be set to Small or None, but not Large. Change the Center and Surround settings to None for stereo mode when listening to 2-channel recordings. The subwoofer will remain on. Use this configuration when you desire the added power of a separate subwoofer for the low frequencies. I Change the left and right speaker setting to Small when using a speaker system consisting of small satellites and a subwoofer. The Center and Surround settings will automatically change to Small, and the Subwoofer setting will remain on; neither setting may be changed. • DVD Bass Management Stereo/LtRt: Use this setting to output a 2-channel signal without a separate low-frequency channel for the subwoofer. The front left and right speakers default to the Large (full-range) setting, with the center, surround and subwoofer speakers all disabled. These settings may not be changed. Select Save when you have finished your adjustments, or Cancel to return to the Audio Setup Menu without making any changes. Digital Audio Out Format: If your system includes 5.1 digital audio surround decoding (Dolby Digital and/or DTS), select Compressed as the digital output. In that case all audio signals will be output with their original format. If your system only includes stereo and/or Dolby Pro Logic, select Uncompressed. Then all audio signals will be output in PCM format only (DTS will output no signal). HDMI Audio Out: This setting determines the format of the audio output via the HDMI Output. It is dependent upon the capabilities of your receiver or video display (if the DMC 1000 is connected directly to a display). We recommend that you leave it at the Auto setting, in which case the DMC 1000 will communicate with the device it's connected to and automatically select a setting that is compatible with that device. • Auto: This is the default setting, and it is recommended that you leave the HDMI Audio Out line at this setting. The DMC 1000 will automatically select the correct setting, based on the capabilities of your receiver or video display. • Uncompressed: At this setting, all digital audio is decoded and output as PCM streams. For example, a DVD with a Dolby Digital soundtrack will be decoded, and 5.1 PCM streams (one per channel) will be output through the HDMI Output for playback by your receiver. • Compressed: This setting may be used with receivers that are capable of decoding digital multichannel formats from the HDMI stream. • Off: Use this setting if your receiver is not capable of processing the audio portion of the HDMI stream and you have made a separate digital audio connection from the DMC 1000 to the receiver. No audio will be passed to the HDMI Output. IMPORTANT NOTE: When the HDMI Output is active for audio, the Optical and Coaxial Digital Audio Outputs are muted. If the HDMI Output is being used for video only and the S/P-DIF outputs are required for audio, turn the HDMI Audio Out setting Off. Video Setup The Video Setting Submenu contains the following settings. Follow the explanations in the Instruction Line on the bottom of your screen to change the settings. These settings are usually set automatically by the DMC 1000, depending on which video output is in use. See Figure 6. Figure 6 - Video Setup Menu Video Output: When both the analog video outputs and the HDMI Output are connected, select the desired video output. Both HDMI and the analog video outputs are not available simultaneously. Example: The HDMI Output is connected to a display in the main listening room and the Composite Video Output is being distributed to a multizone system. 22 SYSTEM SETUP
-
 1
1 -
2
-
3
-
4
-
5
-
6
-
7
-
8
-
9
-
10
-
11
-
12
-
13
-
14
-
15
-
16
-
 17
17 -
 18
18 -
 19
19 -
 20
20 -
 21
21 -
 22
22 -
 23
23 -
 24
24 -
 25
25 -
 26
26 -
 27
27 -
28
-
29
-
30
-
31
-
32
-
33
-
34
-
35
-
36
-
37
-
38
-
39
-
40
-
41
-
42
 |
 |