Hayward Universal H-Series Low NOx Service/Installation: H150FDN H200FDN H25 - Page 33
Iii. Installer Check-out And Start-up, General, Gas Line Testing
 |
View all Hayward Universal H-Series Low NOx manuals
Add to My Manuals
Save this manual to your list of manuals |
Page 33 highlights
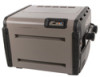
Section III. Installer Check-out and Start-up General: 33 Some of the following procedures will require the heater to be operating. Full lighting and shutdown instructions are included on the lighting and operating label affixed to the inside of the front access panel. The heater automatically lights in response to a call for heat, and automatically shuts down when that call for heat is satisfied. Water must be flowing through the heater during operation. Check that the pump is operating and the system is filled with water and purged of all air prior to starting the heater. Figure 31: Location of Components Figure 31: LocaFtiigounreo3f1c:oLmopcaotnioennotsf Components Blower Vacuum BSlwoiwtcehr Vacuum Switch Fuse Board Keypad Keypad Transformer Fuse Board Gas Valve Transformer Ignition Control Board Gas Valve Sight Glass Ignition Control Board Blower Sight Glass Ignitor Access Panel ICgonviteorr AcGcaesssMPaannifoeld Cover Gas Manifold (H150FD and H200FD models) (H150FD and H200FD models) Blower Air Box Air Box Flame Sensor Flame Sensor Blower Vacuum SBwloiwtcehr Vacuum Switch Transformer TGraanssfVoarmlver Gas Valve Keypad Keypad Ignition Control Board Ignition Control Board Fuse Board Fuse Board Blower Flame Sensor FlIagmnietoSr ensor Access Panel Ignitor AGcacsesMsaPnaifnoeldl (H250FD, H300FD, H350FD, and H400FD models) Blower Sight Glass SAiigr hBtoGxlass Air Box Gas Manifold Gas line testing: (H250FD, H300FD, H350FD, and H400FD models) The appliance and its gas connection must be leak tested before placing the appliance in operation. The heater and its individual shutoff valve must be disconnected from the gas supply during any pressure testing of that system at test pressure in excess of ½ psig (3.45 kPa). The heater must be isolated from the gas sup- ply piping system by closing its individual manual shutoff valve during any pressure testing of the gas supply piping system at test pressure equal to or less than ½ psig (3.45 kPa). Gas supply line must be capped when not connected. After pressure testing, reconnect the gas piping to the gas valve. Turn gas supply "ON" and test all pipe and tubing joints for leaks. Use a soap and water solution. USE ONLY HAYWARD GENUINE REPLACEMENT PARTS Pomona, CA Clemmons, NC Nashville, TN Tel: 908-351-5400 www.haywardpool.com
-
 1
1 -
2
-
3
-
4
-
5
-
6
-
7
-
8
-
9
-
10
-
11
-
12
-
13
-
14
-
15
-
16
-
17
-
18
-
19
-
20
-
21
-
22
-
23
-
24
-
25
-
26
-
27
-
 28
28 -
 29
29 -
 30
30 -
 31
31 -
 32
32 -
 33
33 -
 34
34 -
 35
35 -
 36
36 -
 37
37 -
 38
38 -
39
-
40
-
41
-
42
-
43
-
44
-
45
-
46
-
47
-
48
-
49
-
50
-
51
-
52
-
53
-
54
-
55
-
56
-
57
-
58
-
59
-
60
-
61
-
62
-
63
-
64
 |
 |
