HP 10842 10000 Series Rack Reference Guide - Page 43
Retighten the wing nuts on the adjustable rails.
 |
View all HP 10842 manuals
Add to My Manuals
Save this manual to your list of manuals |
Page 43 highlights
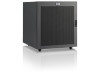
Installing Components 2. Insert at least one screw through the rail-mounting bracket and into the cage nuts installed earlier, securing the adjustable fixed rails to the rear of the rack. NOTE: After installing your components, insert at least one more screw into each adjustable rail for additional support. Figure 4-5: Securing the adjustable fixed rail to the rear of the rack 3. Retighten the wing nuts on the adjustable rails. The adjustable fixed rails are now ready for installation of your components. HP 10000 Series Rack Reference Guide 4-9
-
 1
1 -
2
-
3
-
4
-
5
-
6
-
7
-
8
-
9
-
10
-
11
-
12
-
13
-
14
-
15
-
16
-
17
-
18
-
19
-
20
-
21
-
22
-
23
-
24
-
25
-
26
-
27
-
28
-
29
-
30
-
31
-
32
-
33
-
34
-
35
-
36
-
37
-
 38
38 -
 39
39 -
 40
40 -
 41
41 -
 42
42 -
 43
43 -
 44
44 -
 45
45 -
 46
46 -
 47
47 -
 48
48 -
49
-
50
-
51
-
52
-
53
-
54
-
55
-
56
-
57
-
58
-
59
-
60
-
61
-
62
-
63
-
64
-
65
-
66
-
67
-
68
-
69
-
70
-
71
-
72
-
73
-
74
-
75
 |
 |

Installing Components
HP 10000 Series Rack Reference Guide
4-9
2.
Insert at least one screw through the rail-mounting bracket and into the cage nuts
installed earlier, securing the adjustable fixed rails to the rear of the rack.
NOTE:
After installing your components, insert at least one more screw into each
adjustable rail for additional support.
Figure 4-5:
Securing the adjustable fixed rail to the rear
of the rack
3.
Retighten the wing nuts on the adjustable rails.
The adjustable fixed rails are now ready for installation of your components.