HP 10842 10000 Series Rack Reference Guide - Page 49
Preparing the Component, Adjustable Fixed Rails
 |
View all HP 10842 manuals
Add to My Manuals
Save this manual to your list of manuals |
Page 49 highlights
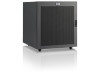
Installing Components 2. Align the rear of the sliding rail with the cage nuts on the rear of the rack and secure with two M6 × 16 screws. Figure 4-11: Securing the rear of the sliding rail Preparing the Component The following are general instructions for installing a typical rack-mountable component. See the documentation that was shipped with each component for complete installation instructions. Adjustable Fixed Rails If the component mounts with fixed rails, typically there is nothing additional to install on the component. The component slides into place along the rails you installed in the rack. HP 10000 Series Rack Reference Guide 4-15
-
 1
1 -
2
-
3
-
4
-
5
-
6
-
7
-
8
-
9
-
10
-
11
-
12
-
13
-
14
-
15
-
16
-
17
-
18
-
19
-
20
-
21
-
22
-
23
-
24
-
25
-
26
-
27
-
28
-
29
-
30
-
31
-
32
-
33
-
34
-
35
-
36
-
37
-
38
-
39
-
40
-
41
-
42
-
43
-
 44
44 -
 45
45 -
 46
46 -
 47
47 -
 48
48 -
 49
49 -
 50
50 -
 51
51 -
 52
52 -
 53
53 -
 54
54 -
55
-
56
-
57
-
58
-
59
-
60
-
61
-
62
-
63
-
64
-
65
-
66
-
67
-
68
-
69
-
70
-
71
-
72
-
73
-
74
-
75
 |
 |

Installing Components
HP 10000 Series Rack Reference Guide
4-15
2.
Align the rear of the sliding rail with the cage nuts on the rear of the rack and
secure with two M6
×
16 screws.
Figure 4-11:
Securing the rear of the sliding rail
Preparing the Component
The following are general instructions for installing a typical rack-mountable
component. See the documentation that was shipped with each component for
complete installation instructions.
Adjustable Fixed Rails
If the component mounts with fixed rails, typically there is nothing additional to
install on the component. The component slides into place along the rails you
installed in the rack.