HP 10842 10000 Series Rack Reference Guide - Page 45
mounting brackets. Note the orientation of the rack-mounting brackets
 |
View all HP 10842 manuals
Add to My Manuals
Save this manual to your list of manuals |
Page 45 highlights
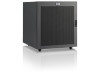
Installing Components 3. After removing the component rails, attach the sliding rail assembly to the rackmounting brackets. Note the orientation of the rack-mounting brackets: a. The front flange (1) has alignment tabs. b. The back flange (2) is designed to install flush against the rack. NOTE: There are eight screw holes in the standard rack-mounting brackets. All of the screw holes may not be used, depending on the component you are installing. Check the documentation shipped with your component to see which screws need to be installed. 1 2 Figure 4-7: Rack-mounting brackets HP 10000 Series Rack Reference Guide 4-11
-
 1
1 -
2
-
3
-
4
-
5
-
6
-
7
-
8
-
9
-
10
-
11
-
12
-
13
-
14
-
15
-
16
-
17
-
18
-
19
-
20
-
21
-
22
-
23
-
24
-
25
-
26
-
27
-
28
-
29
-
30
-
31
-
32
-
33
-
34
-
35
-
36
-
37
-
38
-
39
-
 40
40 -
 41
41 -
 42
42 -
 43
43 -
 44
44 -
 45
45 -
 46
46 -
 47
47 -
 48
48 -
 49
49 -
 50
50 -
51
-
52
-
53
-
54
-
55
-
56
-
57
-
58
-
59
-
60
-
61
-
62
-
63
-
64
-
65
-
66
-
67
-
68
-
69
-
70
-
71
-
72
-
73
-
74
-
75
 |
 |

Installing Components
HP 10000 Series Rack Reference Guide
4-11
3.
After removing the component rails, attach the sliding rail assembly to the rack-
mounting brackets. Note the orientation of the rack-mounting brackets:
a.
The front flange (1) has alignment tabs.
b.
The back flange (2) is designed to install flush against the rack.
NOTE:
There are eight screw holes in the standard rack-mounting brackets. All of the
screw holes may not be used, depending on the component you are installing. Check the
documentation shipped with your component to see which screws need to be installed.
1
2
Figure 4-7:
Rack-mounting brackets