HP 14t-r000 HP 14 Notebook PC Compaq 14 Notebook PC HP 240 G3 Notebook PC HP 2 - Page 73
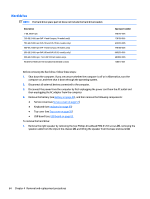
that secure the bracket, to the hard drive.
 |
View all HP 14t-r000 manuals
Add to My Manuals
Save this manual to your list of manuals |
Page 73 highlights
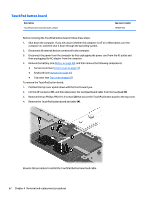
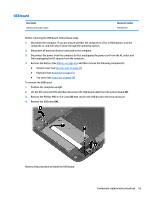
2. Remove the two Phillips PM2.5×3.0 screws (1) that secure the hard drive to the computer. 3. Slide the hard drive to disengage it from the connector (2). 4. Lift the hard drive from the computer (3). 5. To remove the hard drive bracket, remove the two Phillips PM3.0×4.0 screws (1) that secure the bracket to the hard drive. Component replacement procedures 65
-
 1
1 -
2
-
3
-
4
-
5
-
6
-
7
-
8
-
9
-
10
-
11
-
12
-
13
-
14
-
15
-
16
-
17
-
18
-
19
-
20
-
21
-
22
-
23
-
24
-
25
-
26
-
27
-
28
-
29
-
30
-
31
-
32
-
33
-
34
-
35
-
36
-
37
-
38
-
39
-
40
-
41
-
42
-
43
-
44
-
45
-
46
-
47
-
48
-
49
-
50
-
51
-
52
-
53
-
54
-
55
-
56
-
57
-
58
-
59
-
60
-
61
-
62
-
63
-
64
-
65
-
66
-
67
-
 68
68 -
 69
69 -
 70
70 -
 71
71 -
 72
72 -
 73
73 -
 74
74 -
 75
75 -
 76
76 -
 77
77 -
 78
78 -
79
-
80
-
81
-
82
-
83
-
84
-
85
-
86
-
87
-
88
-
89
-
90
-
91
-
92
-
93
-
94
-
95
-
96
-
97
-
98
-
99
-
100
-
101
-
102
-
103
-
104
-
105
-
106
-
107
-
108
-
109
-
110
-
111
-
112
-
113
-
114
-
115
-
116
-
117
-
118
-
119
-
120
-
121
-
122
-
123
-
124
-
125
-
126
-
127
-
128
-
129
-
130
-
131
-
132
-
133
-
134
-
135
-
136
-
137
-
138
-
139
-
140
-
141
-
142
-
143
-
144
 |
 |
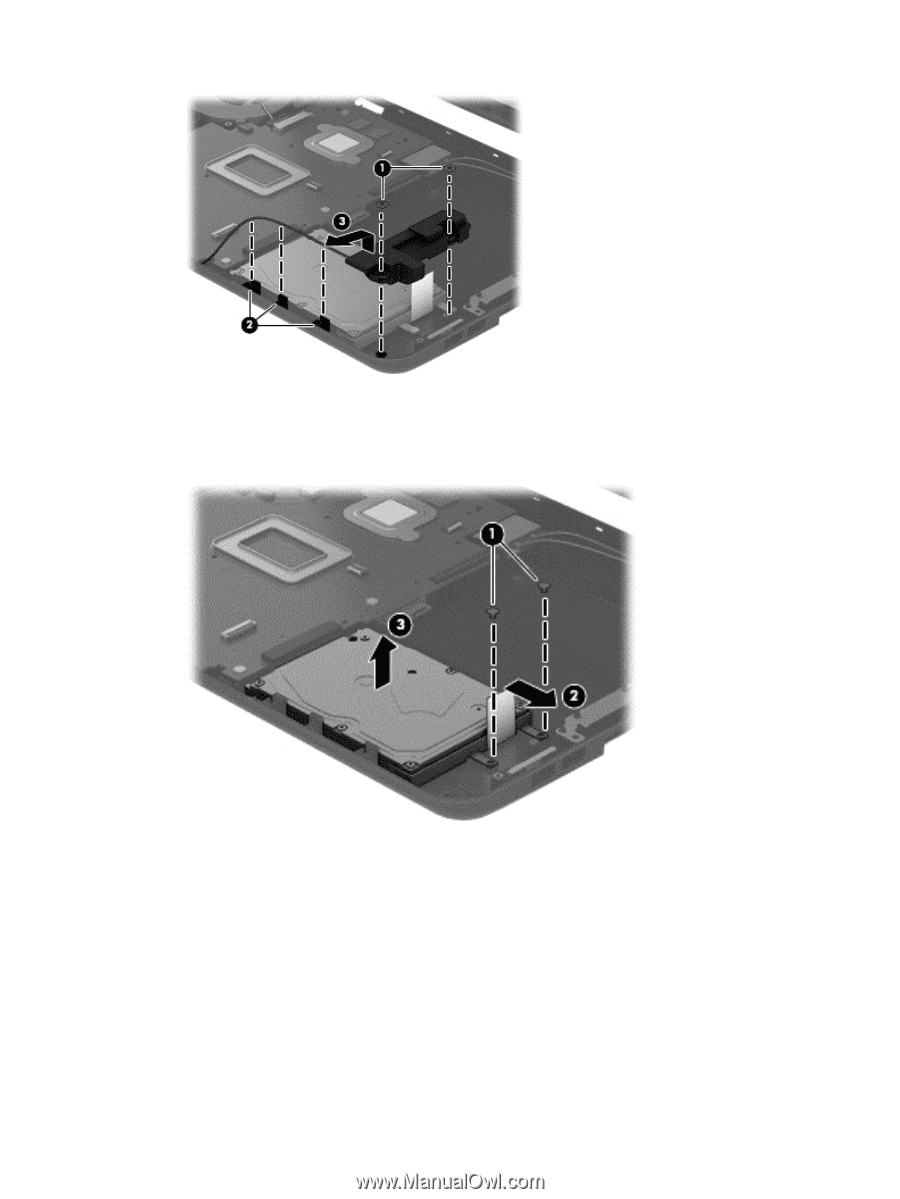
2.
Remove the two Phillips PM2.5×3.0 screws
(1)
that secure the hard drive to the computer.
3.
Slide the hard drive to disengage it from the connector
(2)
.
4.
Lift the hard drive from the computer
(3)
.
5.
To remove the hard drive bracket, remove the two Phillips PM3.0×4.0 screws
(1)
that secure the bracket
to the hard drive.
Component replacement procedures
65