HP 3015 HP LaserJet 3015, 3030, and 3380 All-in-One - (English/French) Fax Gui - Page 14
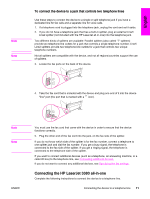
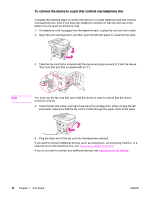
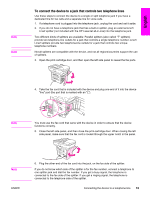
To connect the device to a jack that controls one telephone line, side panel
 |
View all HP 3015 manuals
Add to My Manuals
Save this manual to your list of manuals |
Page 14 highlights
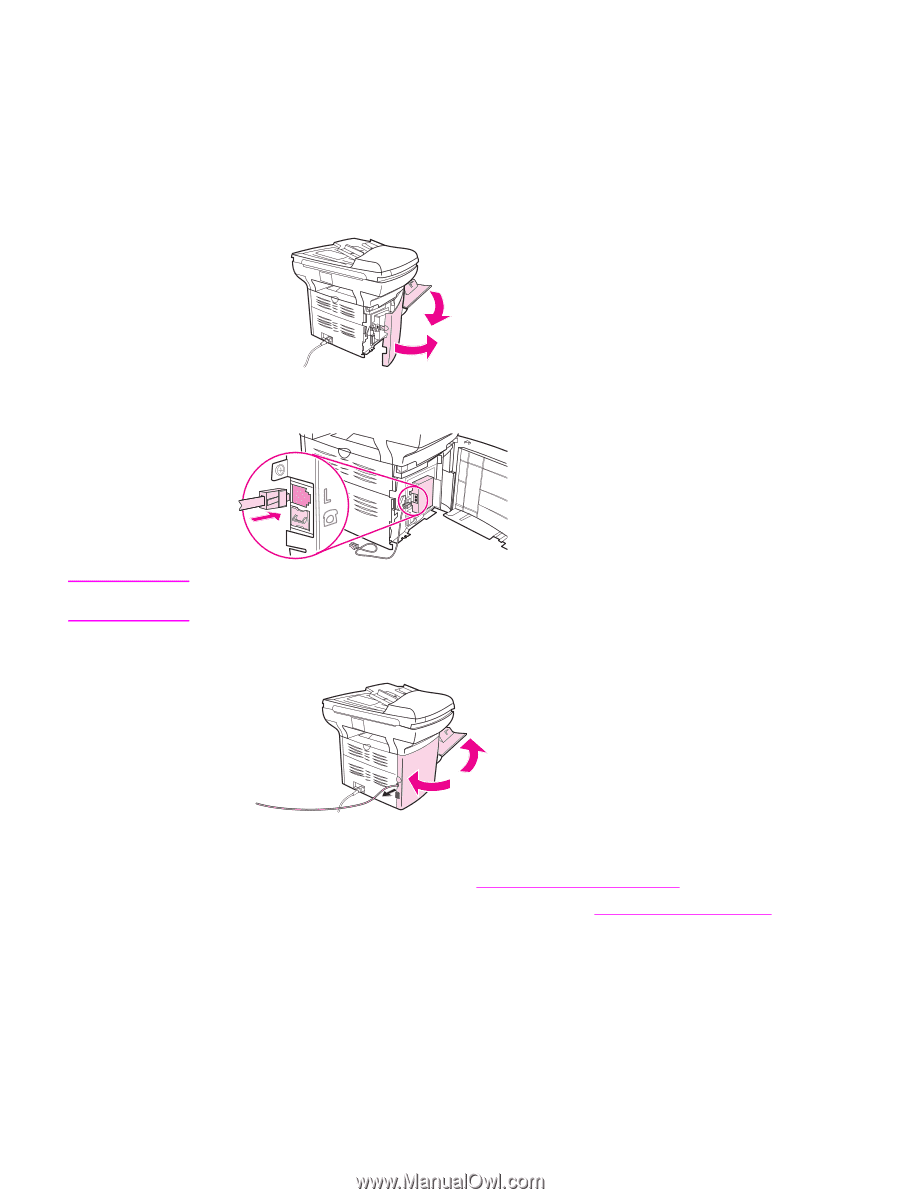
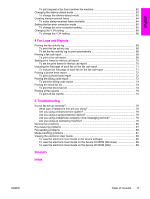
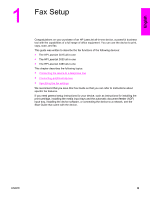
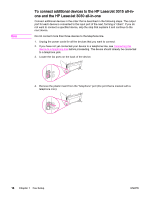
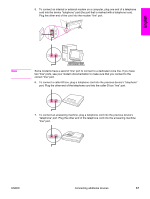
To connect the device to a jack that controls one telephone line Complete the following steps to connect the device to a single telephone jack that controls one telephone line, even if you have two telephone numbers on that line and use a ringpattern service (such as distinctive ring). 1. If a telephone cord is plugged into the telephone jack, unplug the cord and set it aside. 2. Open the print-cartridge door, and then open the left side panel to reveal the fax ports. 3. Take the fax cord that is included with the device and plug one end of it into the device "line" port (the port that is marked with an "L"). Note You must use the fax cord that came with the device in order to ensure that the device functions correctly. 4. Close the left side panel, and then close the print-cartridge door. When closing the left side panel, make sure that the fax cord is routed through the upper notch in the panel. 5. Plug the other end of the fax cord into the telephone wall-jack. If you want to connect additional devices (such as a telephone, an answering machine, or a caller-ID box) to the telephone line, see Connecting additional devices. If you do not want to connect any additional devices, see Specifying the fax settings. 12 Chapter 1 Fax Setup ENWW
-
 1
1 -
2
-
3
-
4
-
5
-
6
-
7
-
8
-
 9
9 -
 10
10 -
 11
11 -
 12
12 -
 13
13 -
 14
14 -
 15
15 -
 16
16 -
 17
17 -
 18
18 -
 19
19 -
20
-
21
-
22
-
23
-
24
-
25
-
26
-
27
-
28
-
29
-
30
-
31
-
32
-
33
-
34
-
35
-
36
-
37
-
38
-
39
-
40
-
41
-
42
-
43
-
44
-
45
-
46
-
47
-
48
-
49
-
50
-
51
-
52
-
53
-
54
-
55
-
56
-
57
-
58
-
59
-
60
-
61
-
62
-
63
-
64
-
65
-
66
-
67
-
68
-
69
-
70
-
71
-
72
-
73
-
74
-
75
-
76
-
77
-
78
-
79
-
80
-
81
-
82
-
83
-
84
-
85
-
86
-
87
-
88
-
89
-
90
-
91
-
92
-
93
-
94
-
95
-
96
-
97
-
98
-
99
-
100
-
101
-
102
-
103
-
104
-
105
-
106
-
107
-
108
-
109
-
110
-
111
-
112
-
113
-
114
-
115
-
116
-
117
-
118
-
119
-
120
-
121
-
122
-
123
-
124
-
125
-
126
-
127
-
128
-
129
-
130
-
131
-
132
-
133
-
134
-
135
-
136
-
137
-
138
-
139
-
140
-
141
-
142
-
143
-
144
-
145
-
146
-
147
-
148
-
149
-
150
-
151
-
152
-
153
-
154
-
155
-
156
-
157
-
158
-
159
-
160
-
161
-
162
-
163
-
164
-
165
-
166
-
167
-
168
-
169
-
170
-
171
-
172
-
173
-
174
-
175
-
176
-
177
-
178
-
179
-
180
-
181
-
182
-
183
-
184
-
185
-
186
-
187
-
188
-
189
-
190
-
191
-
192
-
193
-
194
-
195
-
196
-
197
-
198
-
199
-
200
-
201
-
202
-
203
-
204
-
205
-
206
-
207
-
208
-
209
-
210
-
211
-
212
 |
 |