HP B8550 User Guide - Page 13
Print photos from a PictBridge camera or other PictBridge device, Print from your computer - photosmart review
 |
UPC - 884420048510
View all HP B8550 manuals
Add to My Manuals
Save this manual to your list of manuals |
Page 13 highlights
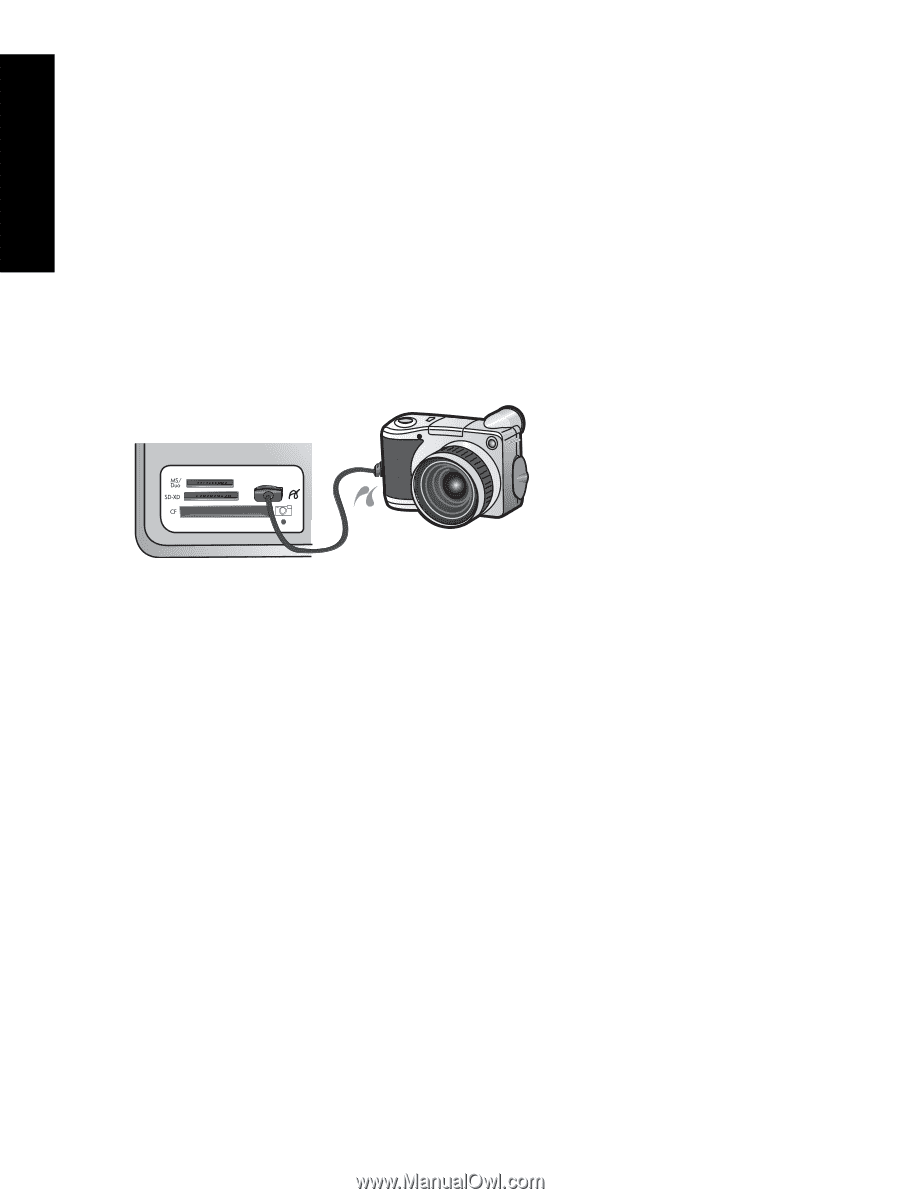
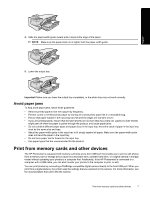
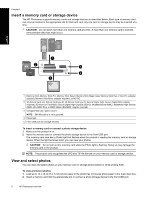
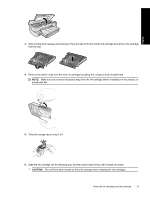
English Chapter 1 3. Make sure View is highlighted, and then press OK. 4. Use the arrow buttons to select a photo, and then press OK. 5. Press Print Photos on the control panel. 6. Follow the instructions on the printer display to modify the print settings: • Select Print Now to print the photo immediately. • Select Add More to change the number of copies. • Select Settings to change the layout. 7. Press OK to print the photo. Print photos from a PictBridge camera or other PictBridge device This section describes the procedure for printing from a PictBridge digital camera. The procedure for printing from other PictBridge devices-such as camera phones and other image capture devices-is very similar. Review the documentation that came with your PictBridge device for specific information. When you print from a digital camera, the printer uses the settings that you selected on the camera. For more information, see the documentation that came with the camera. PictBridge camera being connected to camera port To print using a PictBridge-certified camera 1. Load photo paper in the printer. 2. Turn on the PictBridge-certified digital camera. 3. Make sure the USB configuration setting of the camera is set to Digital Camera, and then connect the camera to the camera port of the printer using the USB cable that came with the PictBridge-certified camera. The Photo light flashes green while the camera establishes a connection to the printer, and then turns solid green. See the camera documentation for more information about the USB configuration setting. The name of the setting and its options may differ on non-HP digital cameras. 4. If you already selected photos for printing on the camera, the Print DPOF Photos? dialog box is displayed on the camera. DPOF (Digital Print Order Format) lets the user mark photos on a digital camera for printing and include other image information, such as number of copies to be printed. Select Yes to print the pre-selected photos, or select No to bypass printing pre-selected photos. 5. Use the options and controls on your camera to print your photos. See the camera documentation for more information. The PictBridge light flashes while the photos are printing. Print from your computer The HP Photosmart can be used with any software application that allows printing. You can print a range of projects, such as borderless images, newsletters, greeting cards, iron-on transfers, and posters. Printing from a computer gives you more options for printing your images. Before printing from your computer, you must install the HP Photosmart software and connect a USB cable from the printer (using the USB port on the back) to your computer. Print from a software application To print from a software application (Windows) 1. Make sure you have paper loaded in the input tray. 2. On the File menu in your software application, click Print. 10 HP Photosmart overview
-
 1
1 -
2
-
3
-
4
-
5
-
6
-
7
-
 8
8 -
 9
9 -
 10
10 -
 11
11 -
 12
12 -
 13
13 -
 14
14 -
 15
15 -
 16
16 -
 17
17 -
 18
18 -
19
-
20
-
21
-
22
-
23
-
24
-
25
-
26
-
27
-
28
-
29
-
30
-
31
-
32
-
33
-
34
-
35
-
36
-
37
-
38
-
39
-
40
-
41
-
42
-
43
-
44
-
45
-
46
-
47
-
48
-
49
-
50
-
51
-
52
-
53
-
54
-
55
-
56
-
57
-
58
-
59
-
60
-
61
-
62
-
63
-
64
-
65
-
66
-
67
-
68
-
69
-
70
-
71
-
72
-
73
-
74
 |
 |