HP B8550 User Guide - Page 21
Setup troubleshooting, The product will not turn
 |
UPC - 884420048510
View all HP B8550 manuals
Add to My Manuals
Save this manual to your list of manuals |
Page 21 highlights
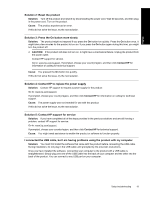
English Chapter 3 When the software installation is complete, the HP Digital Imaging Monitor icon appears in the Windows system tray. To uninstall and reinstall the software (Mac) 1. Disconnect the HP Photosmart from your Mac. 2. Double-click the Applications:Hewlett-Packard folder. 3. Double-click HP Uninstaller. Follow the onscreen instructions. 4. After the software is uninstalled, restart your computer, and then empty the Trash. 5. To reinstall the software, insert the HP Photosmart CD-ROM into your computer's CD-ROM drive. 6. On the desktop, open the CD-ROM and then double-click HP Installer. 7. Follow the onscreen instructions and the printed setup instructions that came with the HP Photosmart. Setup troubleshooting This section contains setup troubleshooting information for the product. The product will not turn on Try the following solutions if there are no light indications, no noise, and no movement from the product when you turn it on. • Solution 1: Make sure you use the power cord that came with the product • Solution 2: Reset the product • Solution 3: Press the On button more slowly • Solution 4: Contact HP to replace the power supply • Solution 5: Contact HP support for service Solution 1: Make sure you use the power cord that came with the product Solution • Make sure the power cord is firmly connected to both the product and the power adapter. Plug the power cord into a power outlet, surge protector, or power strip. 1 Power connection 2 Power cord and adapter 3 Power outlet • If you are using a power strip, make sure the power strip is turned on. Or, try plugging the product directly into a power outlet. • Test the power outlet to make sure it is working. Plug in an appliance that you know works, and see if the appliance has power. If not, then there might be a problem with the power outlet. • If you plugged the product into a switched outlet, make sure the outlet is switched on. If it is switched to on but still does not work, then there might be a problem with the power outlet. Cause: The product was not being used with the power cord provided. If this did not solve the issue, try the next solution. 18 Troubleshooting and support
-
 1
1 -
2
-
3
-
4
-
5
-
6
-
7
-
8
-
9
-
10
-
11
-
12
-
13
-
14
-
15
-
 16
16 -
 17
17 -
 18
18 -
 19
19 -
 20
20 -
 21
21 -
 22
22 -
 23
23 -
 24
24 -
 25
25 -
 26
26 -
27
-
28
-
29
-
30
-
31
-
32
-
33
-
34
-
35
-
36
-
37
-
38
-
39
-
40
-
41
-
42
-
43
-
44
-
45
-
46
-
47
-
48
-
49
-
50
-
51
-
52
-
53
-
54
-
55
-
56
-
57
-
58
-
59
-
60
-
61
-
62
-
63
-
64
-
65
-
66
-
67
-
68
-
69
-
70
-
71
-
72
-
73
-
74
 |
 |
