HP Brocade 8/12c Fabric OS Troubleshooting and Diagnostics Guide v6.4.0 (53-10 - Page 118
Specifying a remote server, Enabling the automatic transfer of trace dumps
 |
View all HP Brocade 8/12c manuals
Add to My Manuals
Save this manual to your list of manuals |
Page 118 highlights
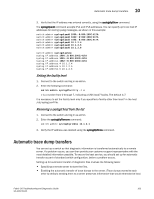
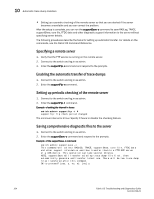
10 Automatic trace dump transfers • Setting up a periodic checking of the remote server so that you are alerted if the server becomes unavailable and you can correct the problem. After the setup is complete, you can run the supportSave -c command to save RASLog, TRACE, supportShow, core file, FFDC data and other diagnostic support information to the server without specifying server details. The following procedures describe the tasks for setting up automatic transfer. For details on the commands, see the Fabric OS Command Reference. Specifying a remote server 1. Verify that the FTP service is running on the remote server. 2. Connect to the switch and log in as admin. 3. Enter the supportFtp -s command and respond to the prompts. Enabling the automatic transfer of trace dumps 1. Connect to the switch and log in as admin. 2. Enter the supportFtp -e command. Setting up periodic checking of the remote server 1. Connect to the switch and log in as admin. 2. Enter the supportFtp -t command. Example of setting the interval in hours switch:admin> supportftp -t 4 supportftp: ftp check period changed The minimum interval is 1 hour. Specify 0 hours to disable the checking feature. Saving comprehensive diagnostic files to the server 1. Connect to the switch and log in as admin. 2. Enter the supportSave -c command and respond to the prompts. Example of the supportSave -c command switch:admin> supportsave -c This command will collect RASLOG, TRACE, supportShow, core file, FFDC data and other support information and then transfer them to a FTP/SCP server or a USB device. This operation can take several minutes. NOTE: supportSave will transfer existing trace dump file first, then automatically generate and transfer latest one. There will be two trace dump files transfered after this command. OK to proceed? (yes, y, no, n): [no] y 104 Fabric OS Troubleshooting and Diagnostics Guide 53-1001769-01
-
 1
1 -
2
-
3
-
4
-
5
-
6
-
7
-
8
-
9
-
10
-
11
-
12
-
13
-
14
-
15
-
16
-
17
-
18
-
19
-
20
-
21
-
22
-
23
-
24
-
25
-
26
-
27
-
28
-
29
-
30
-
31
-
32
-
33
-
34
-
35
-
36
-
37
-
38
-
39
-
40
-
41
-
42
-
43
-
44
-
45
-
46
-
47
-
48
-
49
-
50
-
51
-
52
-
53
-
54
-
55
-
56
-
57
-
58
-
59
-
60
-
61
-
62
-
63
-
64
-
65
-
66
-
67
-
68
-
69
-
70
-
71
-
72
-
73
-
74
-
75
-
76
-
77
-
78
-
79
-
80
-
81
-
82
-
83
-
84
-
85
-
86
-
87
-
88
-
89
-
90
-
91
-
92
-
93
-
94
-
95
-
96
-
97
-
98
-
99
-
100
-
101
-
102
-
103
-
104
-
105
-
106
-
107
-
108
-
109
-
110
-
111
-
112
-
 113
113 -
 114
114 -
 115
115 -
 116
116 -
 117
117 -
 118
118 -
 119
119 -
 120
120 -
 121
121 -
 122
122 -
 123
123 -
124
-
125
-
126
-
127
-
128
-
129
-
130
 |
 |