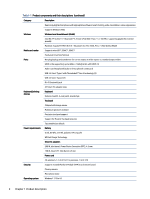
HP Chromebook 11-1100 Maintenance and Service Guide 1 - Page 12
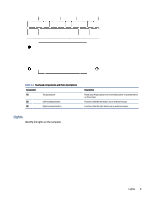
Left side, Identify the components on the left side of the computer.
 |
View all HP Chromebook 11-1100 manuals
Add to My Manuals
Save this manual to your list of manuals |
Page 12 highlights
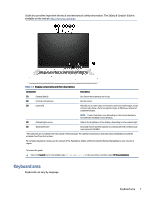
Table 2-1 Right-side components and their descriptions (continued) Component Description Connect a display device that has a USB Type-C connector, providing DisplayPort output. NOTE: Your computer might also support a Thunderbolt docking station. (2) HDMI port Connects an optional video or audio device, such as a highdefinition television, any compatible digital or audio component, or a high-speed High-Definition Multimedia Interface (HDMI) device. (3) USB SuperSpeed 10 Gbps port with HP Sleep Connects a USB device, provides high-speed data transfer, and and Charge charges small devices (such as a smartphone), even when the computer is off. (4) AC adapter and battery light NOTE: Use a standard USB Type-A charging cable or cable adapter (purchased separately) when charging a small external device. ● White: The AC adapter is connected and the battery is fully charged. ● Blinking amber: The AC adapter is disconnected and the battery has reached a low battery level. ● Amber: The AC adapter is connected and the battery is charging. ● Off: The battery is not charging. (5) Power connector Connects an AC adapter. Left side Identify the components on the left side of the computer. Table 2-2 Left-side components and their descriptions Component (1) Vent Description Enables airflow to cool internal components. NOTE: The computer fan starts up automatically to cool internal components and prevent overheating. It is normal for the internal fan to cycle on and off during routine operation. Left side 5
-
 1
1 -
2
-
3
-
4
-
5
-
6
-
 7
7 -
 8
8 -
 9
9 -
 10
10 -
 11
11 -
 12
12 -
 13
13 -
 14
14 -
 15
15 -
 16
16 -
 17
17 -
18
-
19
-
20
-
21
-
22
-
23
-
24
-
25
-
26
-
27
-
28
-
29
-
30
-
31
-
32
-
33
-
34
-
35
-
36
-
37
-
38
-
39
-
40
-
41
-
42
-
43
-
44
-
45
-
46
-
47
-
48
-
49
-
50
-
51
-
52
-
53
-
54
-
55
-
56
-
57
-
58
-
59
-
60
-
61
-
62
-
63
-
64
-
65
-
66
-
67
-
68
-
69
-
70
-
71
-
72
-
73
-
74
-
75
-
76
-
77
-
78
-
79
-
80
-
81
-
82
-
83
-
84
-
85
-
86
-
87
-
88
-
89
-
90
 |
 |