HP Chromebook 11-1100 Maintenance and Service Guide 1 - Page 61
N13380-001: 16.0 in Wide Quad Extended Graphics Array WQXGA 2560×1600, antiglare, non
 |
View all HP Chromebook 11-1100 manuals
Add to My Manuals
Save this manual to your list of manuals |
Page 61 highlights
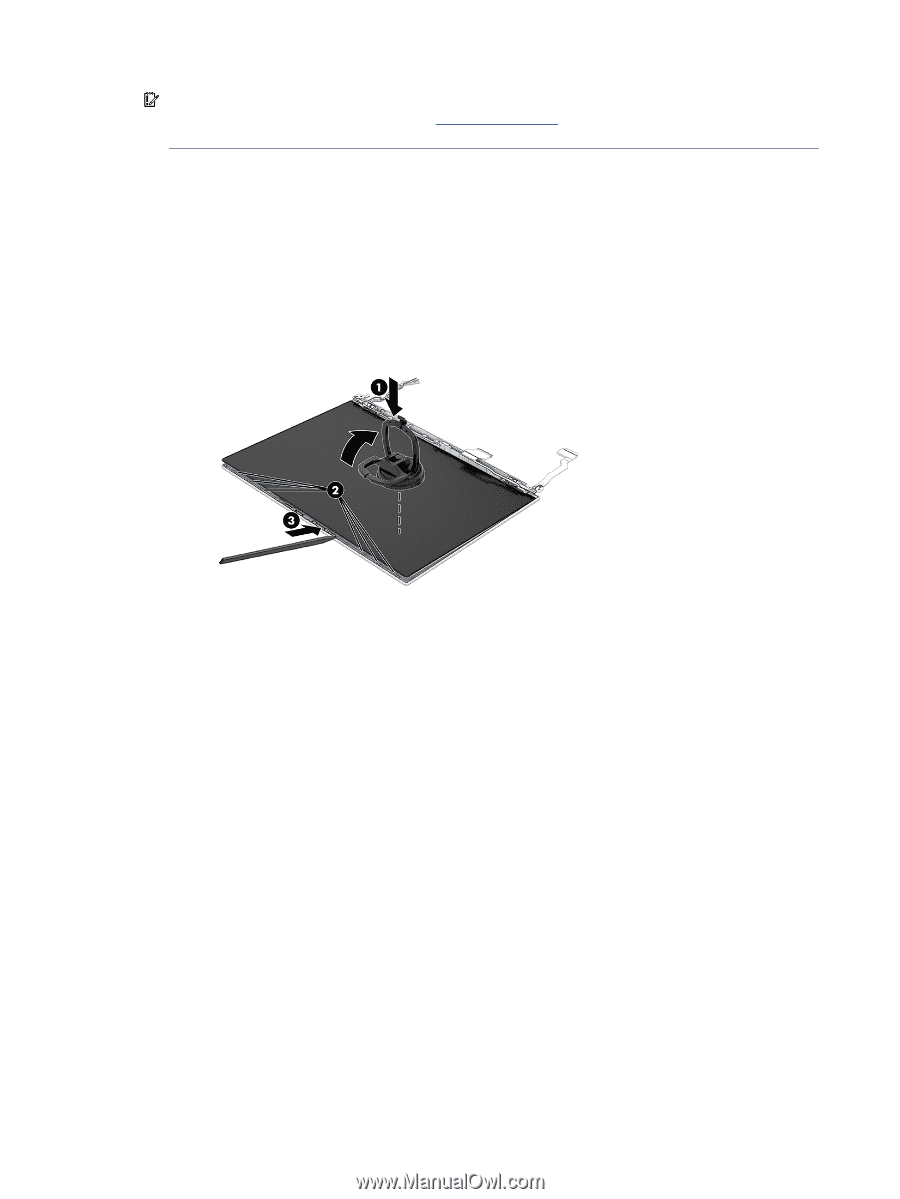
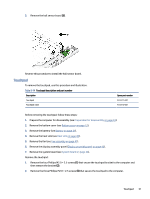
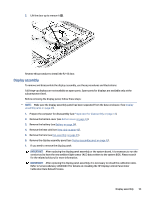
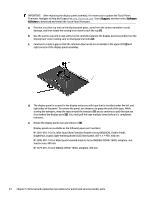
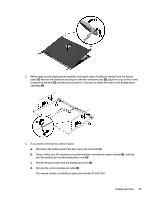
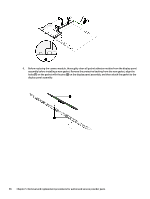
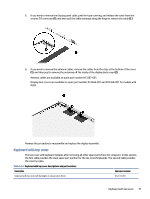
IMPORTANT: After replacing the display panel assembly, it is necessary to update the Touch Panel Firmware. Navigate to Help and Support at http://www.hp.com. Select Support, and then select Software & Drivers to download and install the Touch Panel Firmware. a. Position a suction cup tool on the display panel glass, away from the camera module to avoid damage, and then rotate the locking lever down to lock the cup (1). b. Use the suction cup and a case utility tool to carefully separate the display panel assembly from the display back cover, making sure to disengage the hooks (2). c. Continue to create a gap so that the retention tape areas are accessible in the upper left (3) and right corners of the display panel assembly. d. The display panel is secured to the display enclosure with tape that is installed under the left and right sides of the panel. To remove the panel, use tweezers to grasp the end of the tape. While turning the tweezers, wrap the tape around the tweezers (1) as you continue to pull the tape out from behind the display panel (2). You must pull the tape multiple times before it is completely removed. e. Rotate the display panel over and remove it (3). Display panels are available as the following spare part numbers: N13381-001: 16.0 in, Wide Quad Ultra Extended Graphics Array (WQUXGA), (3840×2400), BrightView, organic light-emitting diode (OLED) bent panel, eDP 1.4 + PSR, 400 nits N13380-001: 16.0 in Wide Quad Extended Graphics Array (WQXGA) (2560×1600), antiglare, nontouchscreen, 400 nits N13379-001: 16.0 in WQXGA (2560×1600), antiglare, 400 nits 54 Chapter 5 Removal and replacement procedures for authorized service provider parts
-
 1
1 -
2
-
3
-
4
-
5
-
6
-
7
-
8
-
9
-
10
-
11
-
12
-
13
-
14
-
15
-
16
-
17
-
18
-
19
-
20
-
21
-
22
-
23
-
24
-
25
-
26
-
27
-
28
-
29
-
30
-
31
-
32
-
33
-
34
-
35
-
36
-
37
-
38
-
39
-
40
-
41
-
42
-
43
-
44
-
45
-
46
-
47
-
48
-
49
-
50
-
51
-
52
-
53
-
54
-
55
-
 56
56 -
 57
57 -
 58
58 -
 59
59 -
 60
60 -
 61
61 -
 62
62 -
 63
63 -
 64
64 -
 65
65 -
 66
66 -
67
-
68
-
69
-
70
-
71
-
72
-
73
-
74
-
75
-
76
-
77
-
78
-
79
-
80
-
81
-
82
-
83
-
84
-
85
-
86
-
87
-
88
-
89
-
90
 |
 |