HP Chromebook 11-ae000 Maintenance and Service Guide - Page 29
slide the edge of the, and then rotate the TouchPad down into place
 |
View all HP Chromebook 11-ae000 manuals
Add to My Manuals
Save this manual to your list of manuals |
Page 29 highlights
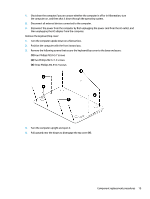
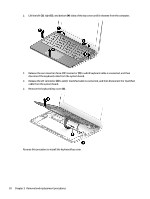
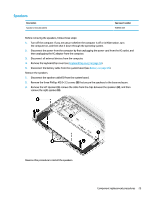
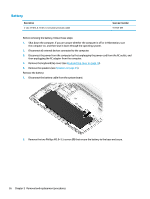
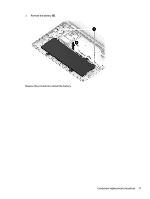
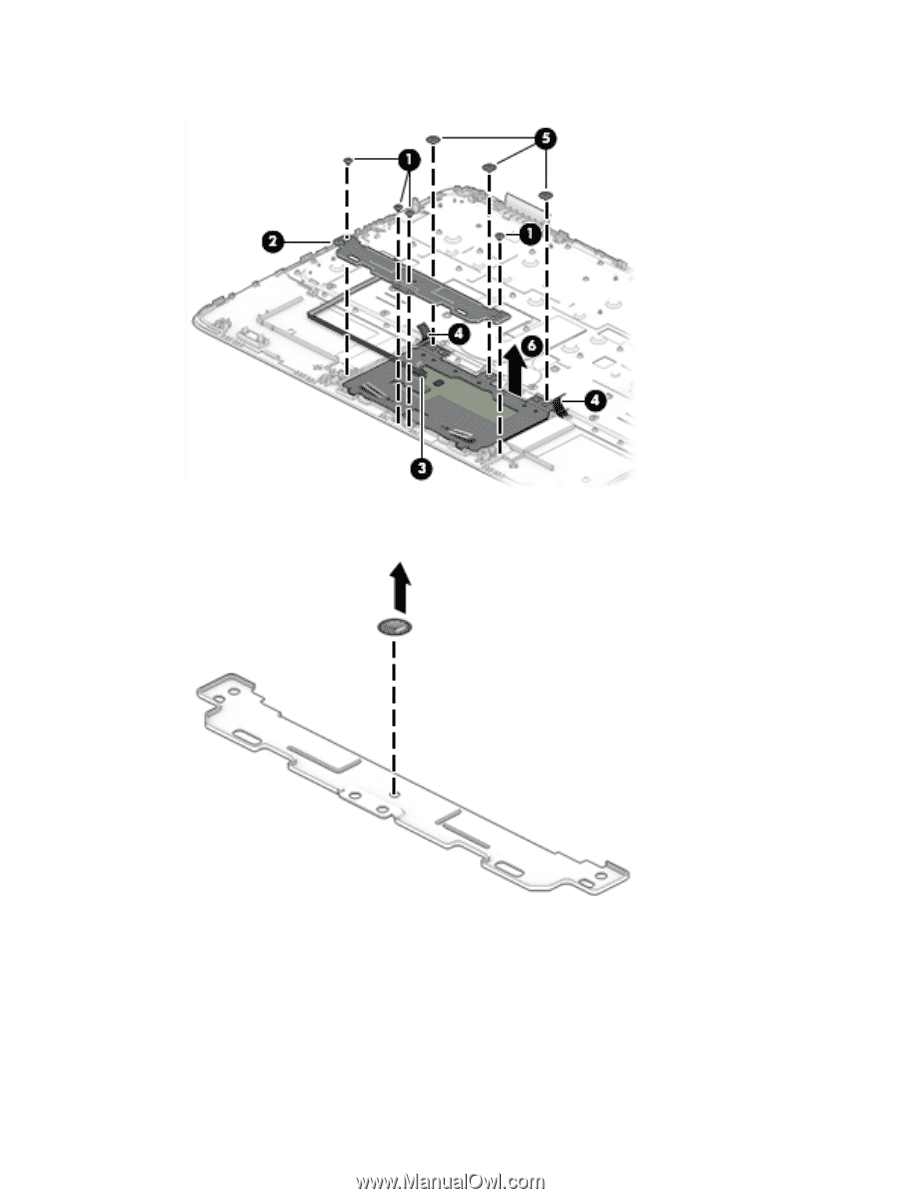
7. Remove the TouchPad from the keyboard/top cover (6). 8. If replacing the TouchPad bracket, remove the rubber piece from the old bracket and install it into the new bracket. To install the TouchPad, insert the top edge of the TouchPad near the screw holes (1), slide the edge of the TouchPad under the Mylar (2), and then rotate the TouchPad down into place (3). Component replacement procedures 23
-
 1
1 -
2
-
3
-
4
-
5
-
6
-
7
-
8
-
9
-
10
-
11
-
12
-
13
-
14
-
15
-
16
-
17
-
18
-
19
-
20
-
21
-
22
-
23
-
 24
24 -
 25
25 -
 26
26 -
 27
27 -
 28
28 -
 29
29 -
 30
30 -
 31
31 -
 32
32 -
 33
33 -
 34
34 -
35
-
36
-
37
-
38
-
39
-
40
-
41
-
42
-
43
-
44
-
45
-
46
-
47
-
48
-
49
-
50
-
51
-
52
-
53
-
54
-
55
-
56
-
57
-
58
-
59
-
60
-
61
 |
 |
7.
Remove the TouchPad from the keyboard/top cover
(6)
.
8.
If replacing the TouchPad bracket, remove the rubber piece from the old bracket and install it into the
new bracket.
To install the TouchPad, insert the top edge of the TouchPad near the screw holes
(1)
, slide the edge of the
TouchPad under the Mylar
(2)
, and then rotate the TouchPad down into place
(3)
.
Component replacement procedures
23