HP Color LaserJet 2550 HP Color LaserJet 2550 series - User Guide - Page 45
Maximizing print speed for letter-size paper, Gaining access to printer driver settings, Print, letter - not printing black
 |
View all HP Color LaserJet 2550 manuals
Add to My Manuals
Save this manual to your list of manuals |
Page 45 highlights
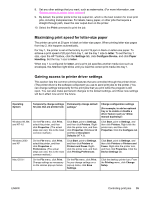
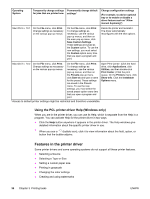
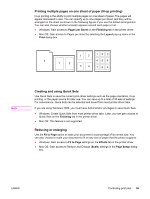
8. Set any other settings that you want, such as watermarks. (For more information, see Gaining access to printer driver settings.) 9. By default, the printer prints to the top output bin, which is the best location for most print jobs, including transparencies. For labels, heavy paper, or other jobs that require a straight-through path, lower the rear output door on the printer. 10. Select the Print command to print the job. Maximizing print speed for letter-size paper The printer can print at 20 ppm in black on letter-size paper. When printing letter-size pages from tray 2, this happens automatically. For tray 1, the printer is set at the factory to print 19 ppm in black on letter-size paper. To achieve a print speed of 20 ppm from tray 1, set the tray 1 size to letter. To set the tray 1 size, open the HP Toolbox, click the Settings tab, click Configure Device, and click Paper Handling. Set the tray 1 size to letter. When tray 1 is configured for letter, and a print job specifies another media size such as envelopes, the Attention light blinks until you load the correct print media into tray 1. Gaining access to printer driver settings This section lists the common printing features that are controlled through the printer driver. (The printer driver is the software component you use to send print jobs to the printer.) You can change settings temporarily for the print jobs that you print while the program is still open. You can also make permanent changes to the default settings, and those new settings will be in effect now and in the future. Operating System Temporarily change settings Permanently change default for jobs that are printed now settings1 Change configuration settings (For example, to add an optional tray or to enable or disable a driver feature such as "Allow manual duplexing") Windows 98, Me, and NT 4.0 On the File menu, click Print, select this printer, and then click Properties. (The actual steps can vary; this is the most common method.) Click Start, point to Settings, and then click Printers. Rightclick the printer icon, and then click Properties (Windows 98 and Me) or Document Defaults (NT 4.0). Click Start, point to Settings, and then click Printers. Right-click the printer icon, and then click Properties. Click the Configure tab. Windows 2000 and XP On the File menu, click Print, select this printer, and then click Properties or Preferences. (The actual steps can vary; this is the most common method.) Click Start, point to Settings, and then click Printers or Printers and Faxes. Rightclick the printer icon, and then click Printing Preferences. Click Start, point to Settings, and then click Printers or Printers and Faxes. Right-click the printer icon, and then click Properties. Click the Device Settings tab. Mac OS 9.1 On the File menu, click Print. Change settings as necessary on the various pop-up menus. On the File menu, click Print. As you change settings on a pop-up menu, click Save Settings. Click the desktop printer icon. From the Printing menu, click Change Setup. ENWW Controlling print jobs 35
-
 1
1 -
2
-
3
-
4
-
5
-
6
-
7
-
8
-
9
-
10
-
11
-
12
-
13
-
14
-
15
-
16
-
17
-
18
-
19
-
20
-
21
-
22
-
23
-
24
-
25
-
26
-
27
-
28
-
29
-
30
-
31
-
32
-
33
-
34
-
35
-
36
-
37
-
38
-
39
-
 40
40 -
 41
41 -
 42
42 -
 43
43 -
 44
44 -
 45
45 -
 46
46 -
 47
47 -
 48
48 -
 49
49 -
 50
50 -
51
-
52
-
53
-
54
-
55
-
56
-
57
-
58
-
59
-
60
-
61
-
62
-
63
-
64
-
65
-
66
-
67
-
68
-
69
-
70
-
71
-
72
-
73
-
74
-
75
-
76
-
77
-
78
-
79
-
80
-
81
-
82
-
83
-
84
-
85
-
86
-
87
-
88
-
89
-
90
-
91
-
92
-
93
-
94
-
95
-
96
-
97
-
98
-
99
-
100
-
101
-
102
-
103
-
104
-
105
-
106
-
107
-
108
-
109
-
110
-
111
-
112
-
113
-
114
-
115
-
116
-
117
-
118
-
119
-
120
-
121
-
122
-
123
-
124
-
125
-
126
-
127
-
128
-
129
-
130
-
131
-
132
-
133
-
134
-
135
-
136
-
137
-
138
-
139
-
140
-
141
-
142
-
143
-
144
-
145
-
146
-
147
-
148
-
149
-
150
-
151
-
152
-
153
-
154
-
155
-
156
-
157
-
158
-
159
-
160
-
161
-
162
-
163
-
164
-
165
-
166
-
167
-
168
-
169
-
170
-
171
-
172
-
173
-
174
-
175
-
176
 |
 |