HP D5360 User Guide - Page 66
Remove ink from your skin and clothing, Clean the HP Photosmart - power cord
 |
UPC - 883585233922
View all HP D5360 manuals
Add to My Manuals
Save this manual to your list of manuals |
Page 66 highlights
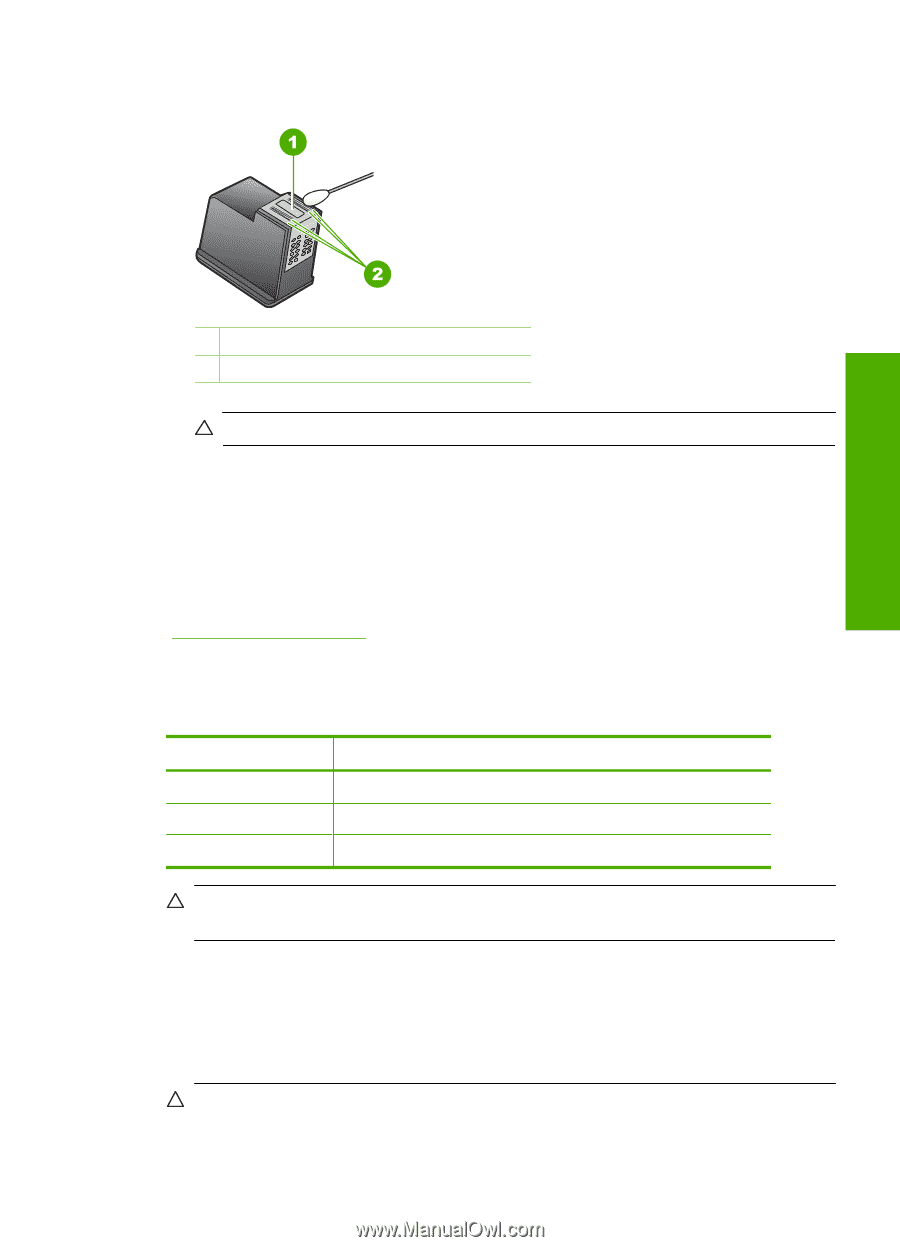
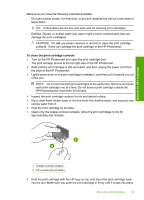
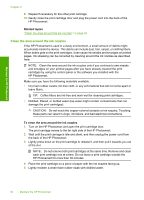
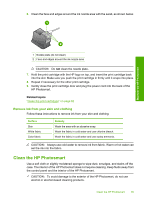
6. Clean the face and edges around the ink nozzle area with the swab, as shown below. Maintain the HP Photosmart 1 Nozzle plate (do not clean) 2 Face and edges around the ink nozzle area CAUTION: Do not clean the nozzle plate. 7. Hold the print cartridge with the HP logo on top, and insert the print cartridge back into the slot. Make sure you push the print cartridge in firmly until it snaps into place. 8. Repeat if necessary for the other print cartridge. 9. Gently close the print cartridge door and plug the power cord into the back of the HP Photosmart. Related topics "Clean the print cartridges" on page 62 Remove ink from your skin and clothing Follow these instructions to remove ink from your skin and clothing: Surface Skin White fabric Color fabric Remedy Wash the area with an abrasive soap. Wash the fabric in cold water and use chlorine bleach. Wash the fabric in cold water and use sudsy ammonia. CAUTION: Always use cold water to remove ink from fabric. Warm or hot water can set the ink into the fabric. Clean the HP Photosmart Use a soft cloth or slightly moistened sponge to wipe dust, smudges, and stains off the case. The interior of the HP Photosmart does not require cleaning. Keep fluids away from the control panel and the interior of the HP Photosmart. CAUTION: To avoid damage to the exterior of the HP Photosmart, do not use alcohol or alcohol-based cleaning products. Clean the HP Photosmart 65
-
 1
1 -
2
-
3
-
4
-
5
-
6
-
7
-
8
-
9
-
10
-
11
-
12
-
13
-
14
-
15
-
16
-
17
-
18
-
19
-
20
-
21
-
22
-
23
-
24
-
25
-
26
-
27
-
28
-
29
-
30
-
31
-
32
-
33
-
34
-
35
-
36
-
37
-
38
-
39
-
40
-
41
-
42
-
43
-
44
-
45
-
46
-
47
-
48
-
49
-
50
-
51
-
52
-
53
-
54
-
55
-
56
-
57
-
58
-
59
-
60
-
 61
61 -
 62
62 -
 63
63 -
 64
64 -
 65
65 -
 66
66 -
 67
67 -
 68
68 -
 69
69 -
 70
70 -
 71
71 -
72
-
73
-
74
-
75
-
76
-
77
-
78
-
79
-
80
-
81
-
82
-
83
-
84
-
85
-
86
-
87
-
88
-
89
-
90
-
91
-
92
-
93
-
94
-
95
-
96
-
97
-
98
-
99
-
100
-
101
-
102
-
103
-
104
-
105
-
106
-
107
-
108
-
109
-
110
-
111
-
112
-
113
-
114
-
115
-
116
-
117
-
118
-
119
-
120
-
121
-
122
-
123
-
124
-
125
-
126
-
127
-
128
-
129
-
130
-
131
-
132
-
133
-
134
-
135
-
136
-
137
-
138
-
139
-
140
-
141
-
142
-
143
-
144
-
145
-
146
-
147
-
148
-
149
 |
 |