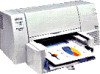
HP Deskjet 890c HP DeskJet 890C Printer Professional Series User's Guide (Engl - Page 8
Replacing and Maintaining, Print Cartridges - ink
 |
View all HP Deskjet 890c manuals
Add to My Manuals
Save this manual to your list of manuals |
Page 8 highlights
Replacing and Maintaining Print Cartridges Replacing A Print Cartridge NOTE Do not remove an empty print cartridge until you are ready to replace it. If one print cartridge is empty, the other cartridge will still print. However, the printer will not print unless both cartridges are in place. See "Ordering Parts and Accessories" in this User's Guide for print cartridge part numbers and ordering information. 1 Turn on the printer, and then open the top cover. The print cartridge cradles move to the center of the printer, and the resume light flashes. 2 Lift up the print cartridge latch, grasp the top of the print cartridge, and pull it up and out of its cradle. Caution Keep new and used print cartridges out of the reach of children. 3 Remove the new print cartridge from its package and gently remove any tape covering the ink nozzles, being careful not to touch the ink nozzles or the gold-colored contacts. NOTE To get the best print quality, make sure the print cartridges are at room temperature before you install them. 4 Push the new cartridge down firmly into its cradle slot and close the print cartridge latch. 5 Close the printer's top cover. The cartridges return to their "home" position on the right side of the printer, and the resume light stops flashing. 6 Section 1 - Printing Basics
-
 1
1 -
2
-
 3
3 -
 4
4 -
 5
5 -
 6
6 -
 7
7 -
 8
8 -
 9
9 -
 10
10 -
 11
11 -
 12
12 -
 13
13 -
14
-
15
-
16
-
17
-
18
-
19
-
20
-
21
-
22
-
23
-
24
-
25
-
26
-
27
-
28
-
29
-
30
-
31
-
32
 |
 |
