HP Dx5150 Desktop Management Guide (3rd Edition) - Page 18
Integrated Peripherals, South OnChip IDE Device, Enter, Ctrl+Alt+Del, FORMAT C: /S
 |
UPC - 882780485433
View all HP Dx5150 manuals
Add to My Manuals
Save this manual to your list of manuals |
Page 18 highlights
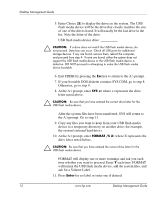
Desktop Management Guide 3. Insert the USB flash media device into one of the computer's USB ports and remove all other USB storage devices except USB diskette drives. Close the computer cover. 4. Plug in the power cord and turn on the computer. 5. As soon as the computer is turned on, press and hold the F10 key until you enter Computer Setup. Press Enter to bypass the title screen, if necessary. ✎ If you do not press the F10 key at the appropriate time, you must restart the computer and press and hold the F10 key again to access the utility. If you are using a PS/2 keyboard, you may see a Keyboard Error message-disregard it. 6. Go to Integrated Peripherals > South OnChip IDE Device to disable the PATA controller, and go to Integrated Peripherals > South OnChip PCI Device to disable the SATA controller. Exit setup, confirming the changes. 7. Insert a bootable DOS diskette with FDISK.COM and either SYS.COM or FORMAT.COM into a diskette drive and turn on the computer to boot to the DOS diskette. 8. Run FDISK and delete any existing partitions on the USB flash media device. Create a new partition and mark it active. Exit FDISK by pressing the Esc key. 9. If the system did not automatically restart when exiting FDISK, press Ctrl+Alt+Del to reboot to the DOS diskette. 10. At the A:\ prompt, type FORMAT C: /S and press Enter. Format will format the USB flash media device, add the system files, and ask for a Volume Label. 11. Press Enter for no label or enter one if desired. 12. Turn off the computer and unplug the power cord. Open the computer and re-install any PCI cards that were previously removed. Close the computer cover. 13. Plug in the power cord, remove the diskette, and turn on the computer. 14 www.hp.com Desktop Management Guide
-
 1
1 -
2
-
3
-
4
-
5
-
6
-
7
-
8
-
9
-
10
-
11
-
12
-
 13
13 -
 14
14 -
 15
15 -
 16
16 -
 17
17 -
 18
18 -
 19
19 -
 20
20 -
 21
21 -
 22
22 -
 23
23 -
24
-
25
-
26
-
27
-
28
-
29
-
30
 |
 |