HP ENVY 13-d000 Maintenance and Service Guide - Page 60
13.3-in, RGBW QHD+, WLED, BrightView 3200×1800, FHD, AntiGlare 1920×1080
 |
View all HP ENVY 13-d000 manuals
Add to My Manuals
Save this manual to your list of manuals |
Page 60 highlights
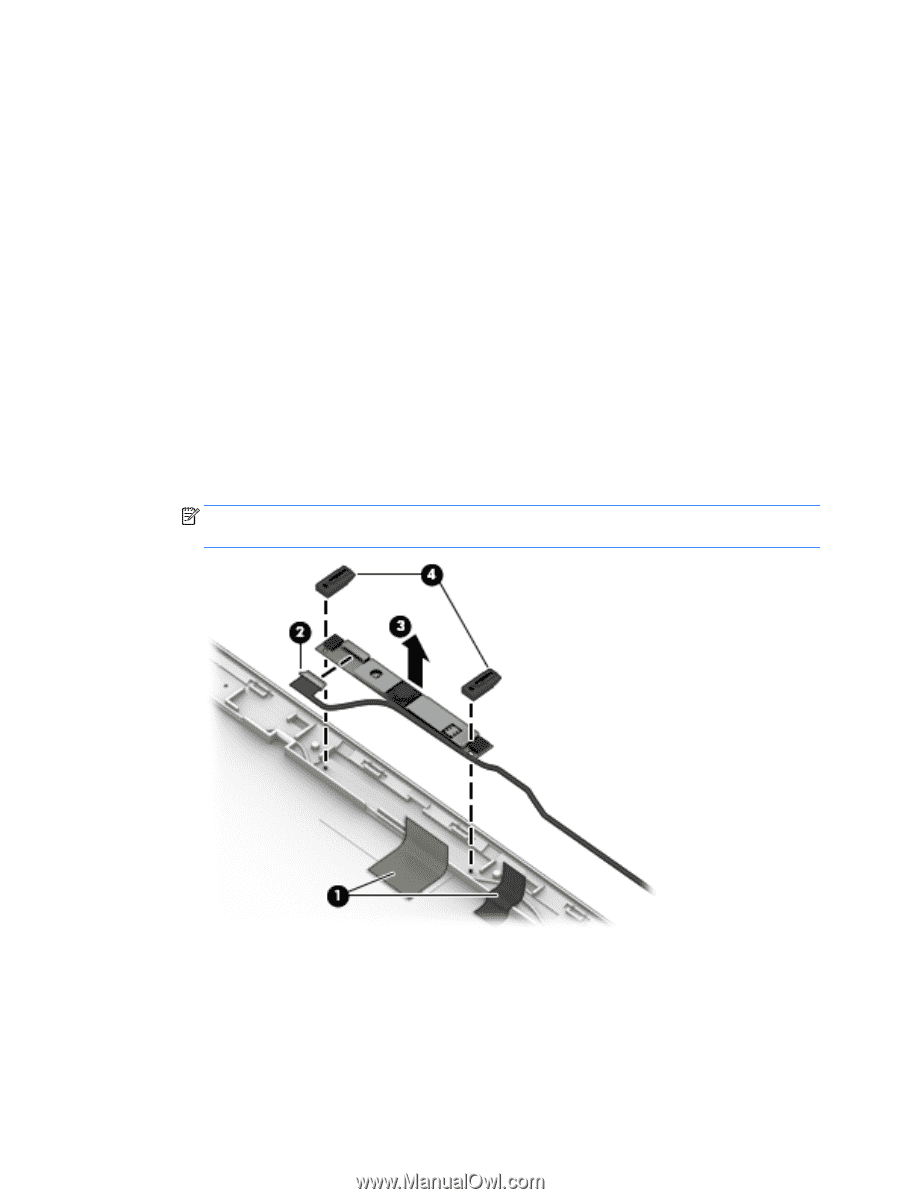
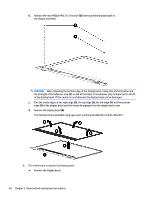
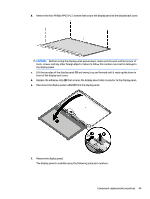
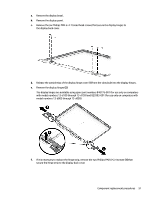
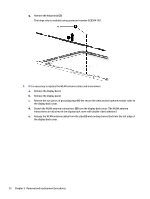
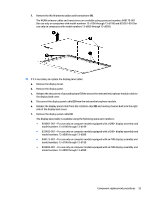
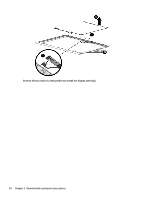
● 848177-001 - 13.3-in, RGBW QHD+, WLED, BrightView (3200×1800), ultraslim-flat (2.6-mm), UWVA display panel for use only on computers with model numbers 13-d100 through 13d199 ● 815165-001 - 13.3-in, RGBW QHD+, WLED, BrightView (3200×1800), ultraslim-flat (2.6-mm), UWVA display panel for use only on model numbers 13-d000 through 13-d099 ● 848178-001 - 13.3-in, FHD, WLED, AntiGlare (1920×1080), ultraslim-flat (2.6-mm), UWVA display panel for use only on computers with model numbers 13-d100 through 13-d199 ● 830567-001 - 13.3-in, FHD, WLED, AntiGlare (1920×1080), ultraslim-flat (2.6-mm), UWVA display panel for use only on model numbers 13-d000 through 13-d099 7. If it is necessary to replace the webcam/microphone module: a. Remove the display bezel. b. Remove the display panel. c. Release the two pieces of grounding tape (1) the secure the webcam/microphone module cable to the display back cover. d. Disconnect the webcam/microphone module cable (2) from the webcam/microphone module. e. Detach the webcam/microphone module (3) from the display back cover. (The webcam/ microphone module is attached to the display back cover with double-sided adhesive.) NOTE: When releasing the webcam/microphone module, make sure the microphone rubber isolators (4) do not get lost. These isolators are important to the microphone performance. f. Remove the webcam/microphone module. The webcam/microphone module is available using spare part numbers 854982-001 (for use only on computers with model numbers 13-d100 through 13-d199) and 833512-001 (for use only on computers with model numbers 13-d000 through 13-d099). 8. If it is necessary to replace the display hinges: 50 Chapter 5 Removal and replacement procedures
-
 1
1 -
2
-
3
-
4
-
5
-
6
-
7
-
8
-
9
-
10
-
11
-
12
-
13
-
14
-
15
-
16
-
17
-
18
-
19
-
20
-
21
-
22
-
23
-
24
-
25
-
26
-
27
-
28
-
29
-
30
-
31
-
32
-
33
-
34
-
35
-
36
-
37
-
38
-
39
-
40
-
41
-
42
-
43
-
44
-
45
-
46
-
47
-
48
-
49
-
50
-
51
-
52
-
53
-
54
-
 55
55 -
 56
56 -
 57
57 -
 58
58 -
 59
59 -
 60
60 -
 61
61 -
 62
62 -
 63
63 -
 64
64 -
 65
65 -
66
-
67
-
68
-
69
-
70
-
71
-
72
-
73
-
74
-
75
-
76
-
77
-
78
-
79
-
80
-
81
-
82
 |
 |