HP ENVY Inspire 7900e User Guide - Page 20
Connect your printer using a USB cable, Change wireless settings, Wireless status of the printer
 |
View all HP ENVY Inspire 7900e manuals
Add to My Manuals
Save this manual to your list of manuals |
Page 20 highlights
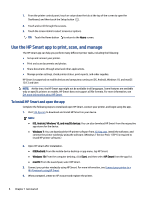
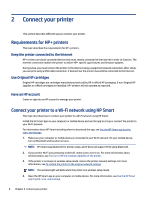
4. Touch Wireless Setup Wizard or Wi-Fi Protected Setup. 5. Follow the display instructions to complete the setup. If you are already using the printer with a different type of connection, such as a USB connection, follow the instructions in Change the connection type to set up the printer on your wireless network. Connect your printer using a USB cable NOTE: ● Do not connect the printer with a USB cable when setting up for the first time. HP+ printer will not work as expected if USB is used for setting up for the first time. ● To set up and use the printer, it must be connected to the Internet at all times. See the requirements listed in Requirements for HP+ printers. 1. If necessary, remove the label covering the USB port at the back of the printer. 2. Connect the printer and computer using a USB cable. 3. Open the HP Smart app on your computer. For more information, see Use the HP Smart app to print, scan, and manage. 4. From HP Smart, click or tap the Plus icon a printer. or Add Printer, and then choose the option to select or add Follow the instructions to add the printer. 5. When prompted, create an HP account and register the printer. Change wireless settings You can set up and manage the wireless connection for your printer. This includes printing information about network settings, turning the wireless function on or off, and restoring wireless settings. Wireless status of the printer Print the wireless test report for information about the printer wireless connection. The wireless test report provides information about the printer status, hardware (MAC) address, and IP address. If there is a problem with the wireless connection or if a wireless connection attempt failed, the wireless test report also provides diagnostic information. If the printer is connected to a network, the test report displays details about the network settings. 1. From the printer control panel, touch or swipe down the tab at the top of the screen to open the Dashboard, touch the Wireless button , and then touch the Settings button . 2. Touch Print Details or Print Network Configuration. Turn on or off the wireless capability of the printer The blue Wireless light on the printer control panel is lit when the wireless capability of the printer is on. 10 Chapter 2 Connect your printer
-
 1
1 -
2
-
3
-
4
-
5
-
6
-
7
-
8
-
9
-
10
-
11
-
12
-
13
-
14
-
 15
15 -
 16
16 -
 17
17 -
 18
18 -
 19
19 -
 20
20 -
 21
21 -
 22
22 -
 23
23 -
 24
24 -
 25
25 -
26
-
27
-
28
-
29
-
30
-
31
-
32
-
33
-
34
-
35
-
36
-
37
-
38
-
39
-
40
-
41
-
42
-
43
-
44
-
45
-
46
-
47
-
48
-
49
-
50
-
51
-
52
-
53
-
54
-
55
-
56
-
57
-
58
-
59
-
60
-
61
-
62
-
63
-
64
-
65
-
66
-
67
-
68
-
69
-
70
-
71
-
72
-
73
-
74
-
75
-
76
-
77
-
78
-
79
-
80
-
81
-
82
-
83
-
84
-
85
-
86
-
87
-
88
-
89
-
90
-
91
-
92
-
93
-
94
-
95
-
96
-
97
-
98
-
99
 |
 |
