HP G3110 HP Scanjet G3110 User Guide - Page 10
Scan to a PDF file, Scan to e-mail, Show a preview, Add s, Finish, Scan to PDF
 |
UPC - 883585789023
View all HP G3110 manuals
Add to My Manuals
Save this manual to your list of manuals |
Page 10 highlights
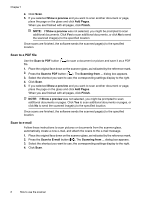
Chapter 1 4. Click Scan. 5. If you selected Show a preview and you want to scan another document or page, place the page on the glass and click Add Pages. When you are finished with all pages, click Finish. NOTE: If Show a preview was not selected, you might be prompted to scan additional documents. Click Yes to scan additional documents, or click No to send the scanned image(s) to the specified location. Once scans are finished, the software sends the scanned page(s) to the specified location. Scan to a PDF file Use the Scan to PDF button ( ) to scan a document or picture and save it as a PDF file. 1. Place the original face down on the scanner glass, as indicated by the reference mark. 2. Press the Scan to PDF button ( ). The Scanning from ... dialog box appears. 3. Select the shortcut you want to use; the corresponding settings display to the right. 4. Click Scan. 5. If you selected Show a preview and you want to scan another document or page, place the page on the glass and click Add Pages. When you are finished with all pages, click Finish. NOTE: If Show a preview was not selected, you might be prompted to scan additional documents or pages. Click Yes to scan additional documents or pages, or click No to send the scanned image(s) to the specified location. Once scans are finished, the software sends the scanned page(s) to the specified location. Scan to e-mail Follow these instructions to scan pictures or documents from the scanner glass, automatically create a new e-mail, and attach the scans to the e-mail message. 1. Place the original face down on the scanner glass, as indicated by the reference mark. 2. Press the Scan to E-mail button ( ). The Scanning from ... dialog box appears. 3. Select the shortcut you want to use; the corresponding settings display to the right. 4. Click Scan. 8 How to use the scanner
-
 1
1 -
2
-
3
-
4
-
 5
5 -
 6
6 -
 7
7 -
 8
8 -
 9
9 -
 10
10 -
 11
11 -
 12
12 -
 13
13 -
 14
14 -
 15
15 -
16
-
17
-
18
-
19
-
20
-
21
-
22
-
23
-
24
-
25
-
26
-
27
-
28
-
29
-
30
 |
 |
