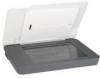
HP G3110 HP Scanjet G3110 User Guide - Page 21
No light or only dim light is visible in the TMA after selecting a slides or negatives scanning shor ..., Scanner installation troubleshooting, Uninstall and reinstall the software - scanjet windows 7 software
 |
UPC - 883585789023
View all HP G3110 manuals
Add to My Manuals
Save this manual to your list of manuals |
Page 21 highlights
No light or only dim light is visible in the TMA after selecting a slides or negatives scanning shortcut After each step, start a scan to see if the scanner is working. If not, proceed with the next step. 1. Make sure that the TMA is connected to the scanner. 2. The bulb in the TMA might not be working. Click the Scan button ( illumination. If the bulb is broken, service is required. ) and look for 3. The TMA has a short warm-up mode. Wait a few seconds to see if the light turns on. For the best scanning quality, let the TMA light warm up for at least 30 seconds. Scanner installation troubleshooting This section contains solutions for installation and setup problems. • Uninstall and reinstall the software • Check the cables Uninstall and reinstall the software An incomplete software installation could cause the scanner not to be recognized or the software not to launch correctly. Try uninstalling and then reinstalling the HP Scanning software. To reinstall the HP Scanning software, you must have the HP Photosmart software CD. 1. Click Start, click Settings, and then click Control Panel (in Windows XP and Vista, click Start, and then click Control Panel). 2. Click Add or Remove Programs (in Windows Vista, the Programs and Features tool) and then select HP Scanjet G3110. 3. Click Remove. 4. Click Add or Remove Programs (in Windows Vista, the Programs and Features tool) and then select the HP Photosmart software. 5. Click Remove. 6. Unplug the scanner USB cable from the computer. 7. Reinstall the software, using the HP Photosmart software CD that came with your scanner. When you insert the CD, an installation interface launches automatically. Choose the HP Photosmart software to install. 8. Reconnect the scanner USB cable after the software is installed. For more information see Check the cables. Scanner installation troubleshooting 19
-
 1
1 -
2
-
3
-
4
-
5
-
6
-
7
-
8
-
9
-
10
-
11
-
12
-
13
-
14
-
15
-
 16
16 -
 17
17 -
 18
18 -
 19
19 -
 20
20 -
 21
21 -
 22
22 -
 23
23 -
 24
24 -
 25
25 -
 26
26 -
27
-
28
-
29
-
30
 |
 |