HP Indigo 20000 CA493-00130 Rev - Page 7
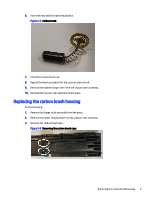
Removing the charge roller rails and engage mechanisms, From the front side of the charge roller
 |
View all HP Indigo 20000 manuals
Add to My Manuals
Save this manual to your list of manuals |
Page 7 highlights
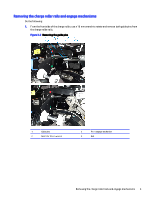
Removing the charge roller rails and engage mechanisms Do the following: 1. From the front side of the charge roller, use a 10 mm wrench to rotate and remove both guide pins from the charge roller rails. Figure 3-2 Removing the guide pins 1 Guide pins 2 Notch for 10 mm wrench 3 Front engage mechanism 4 Rail Removing the charge roller rails and engage mechanisms 5
-
 1
1 -
 2
2 -
 3
3 -
 4
4 -
 5
5 -
 6
6 -
 7
7 -
 8
8 -
 9
9 -
 10
10 -
 11
11 -
 12
12 -
13
-
14
-
15
-
16
-
17
-
18
-
19
-
20
-
21
-
22
-
23
-
24
-
25
-
26
-
27
-
28
-
29
-
30
-
31
-
32
-
33
 |
 |

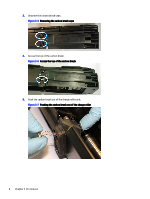
Removing the charge roller rails and engage mechanisms
Do the following:
1.
From the front side of the charge roller, use a 10 mm wrench to rotate and remove both guide pins from
the charge roller rails.
Figure 3-2
Removing the guide pins
1
Guide pins
3
Front engage mechanism
2
Notch for 10 mm wrench
4
Rail
Removing the charge roller rails and engage mechanisms
5