HP Indigo 5000 HP DesignJet 5000 Series Printer - Setup Poster - Page 5
Install Deflectors HP DesignJet 60 inch/1.52 m only, Bin Assembly installation HP DesignJet 42 inch/ - dimensions
 |
View all HP Indigo 5000 manuals
Add to My Manuals
Save this manual to your list of manuals |
Page 5 highlights
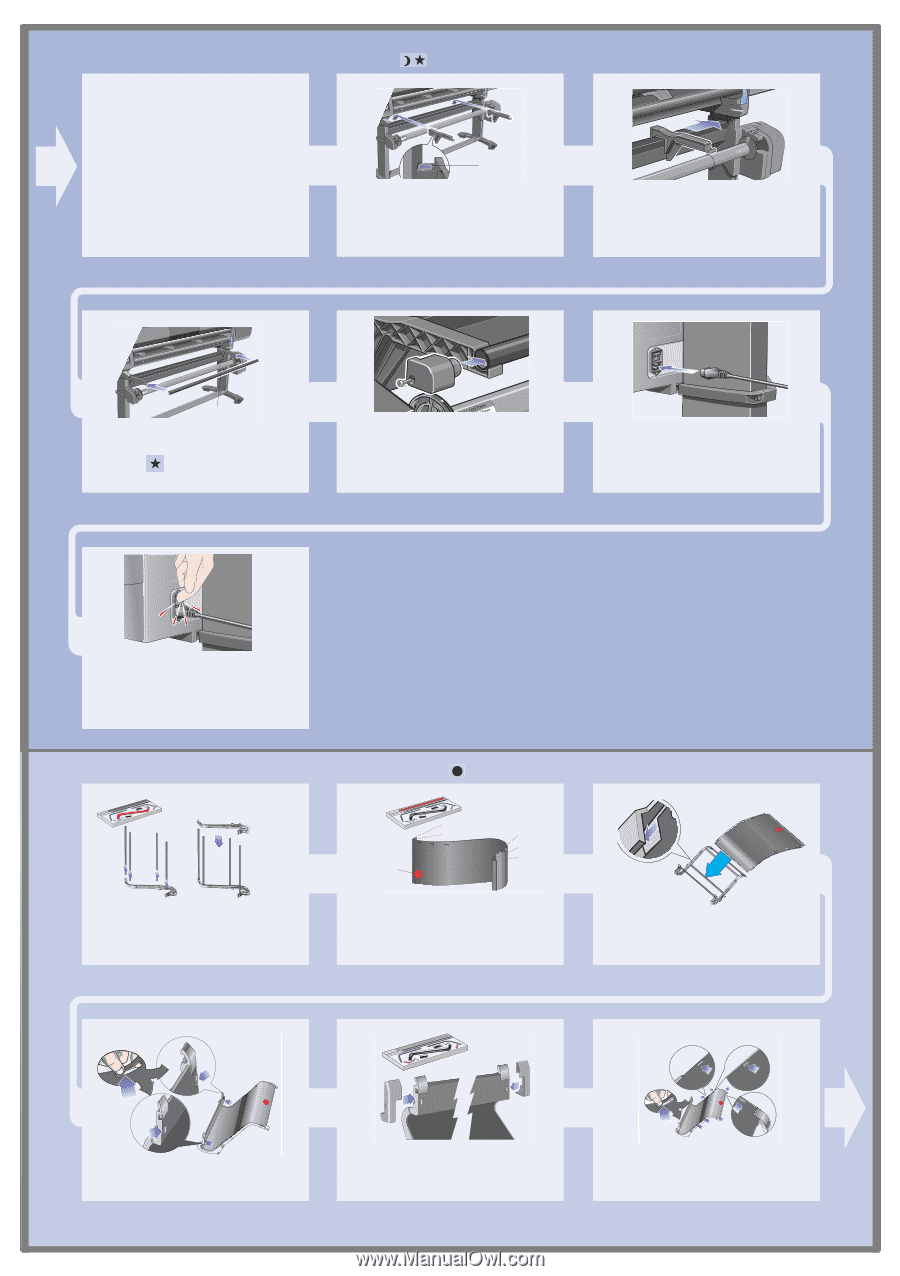
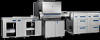
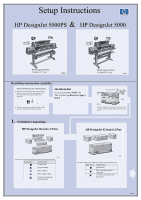
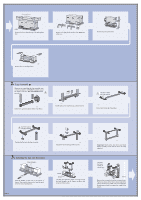
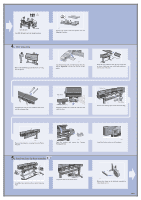
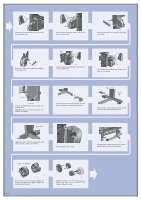
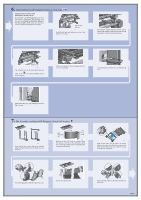
6. Install Deflectors (HP DesignJet 60 inch/1.52 m only) Important note for owners of the HP DesignJet 42 inch (1.07 m) If your printer is an HP DesignJet 42 inch (1.07 m) and you have ordered the Take-Up Reel as an accessory, you should not install the deflectors. The bin assembly, which is the next procedure, contains a deflector integrated into its design. Tabs facing this way st547 Install the left and right deflectors on top of the printer's cross brace. st548 Slide deflector supports sideways until the T-piece on top of the support is fully inserted into the gap between the cross brace and the printer leg. Deflector bar st549 The deflector bar can be found inside the core tubes, in the box. Rest the deflector bar on the two supports. st550 Attach end caps to the bar and supports with the two screws provided. st543 Connect the power cord into the rear of the take-up reel. Turn on the take-up reel by turning the switch to On at the rear. 7. Bin Assembly installation (HP DesignJet 42 inch/1.07 m only) st579 Insert the four bars into the slots in the right bin holder, and then mount the left bin holder on to the four bars. 1cm 1cm 7cm Red 1cm orientation 1cm dot st580 Remove the bin 'film' from its container. Make five creases in the film at the dimensions shown above. Note the position of the red orientation dot in relation to the creases. st581 Slide the bin 'film' into the grooves in the bin holders. Insert the end with the two creases first. Slide the film fully to the end, so that the creases are in the correct positions. st582 Secure the film in place with two clips at one end. st583 Attach caps onto the clips. st584 Secure the film in place at the other end with two more clips. Page 5
-
 1
1 -
 2
2 -
 3
3 -
 4
4 -
 5
5 -
 6
6 -
 7
7 -
 8
8 -
 9
9 -
 10
10 -
 11
11 -
12
 |
 |