HP Indigo 5000 HP DesignJet 5000 Series Printer - Setup Poster - Page 6
Front Panel Label and Power - press
 |
View all HP Indigo 5000 manuals
Add to My Manuals
Save this manual to your list of manuals |
Page 6 highlights
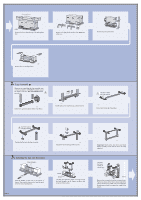
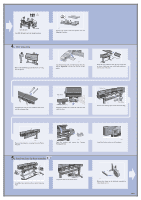
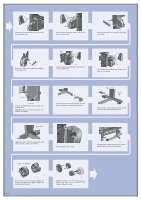
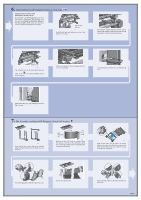
st585 Attach caps onto the clips. st586 Install end pieces to the film and sides as shown above. st586a Remove the red orientation dot. st587 Install the right adapter to the right leg at the rear as shown above. The right hand adapter is marked with the letter 'R'. st588 Install the left hand adapter to the left leg at the rear as shown above. The left hand adapter is marked with the letter 'L'. st589 Insert the bin on to the adaptors horizontally and insert the small pins into their slots. st590 Raise the bin until the large pins align with their slots and the bin drops into place. 8. Front Panel Label and Power On Cutouts st556 Attach the Front Panel Overlay to the Front Panel. Ensure that the cutouts on the Overlay are correctly positioned on the Front Panel locating tabs. Install the extensions onto the media deflectors. 2 1 st557 Plug the power cord into the socket next to the power switch, and then into the AC power outlet. 2 1 st558 Turn the power isolator switch at the rear of the printer to the on position. Page 6 st557 Select the language you want for the front panel using the up and down keys. Press Enter.
-
 1
1 -
 2
2 -
 3
3 -
 4
4 -
 5
5 -
 6
6 -
 7
7 -
 8
8 -
 9
9 -
 10
10 -
 11
11 -
 12
12
 |
 |
