HP Kayak XU 03xx hp kayak pc workstations, using sound - Page 25
Multimedia Control Panel Connector, from an external source
 |
View all HP Kayak XU 03xx manuals
Add to My Manuals
Save this manual to your list of manuals |
Page 25 highlights
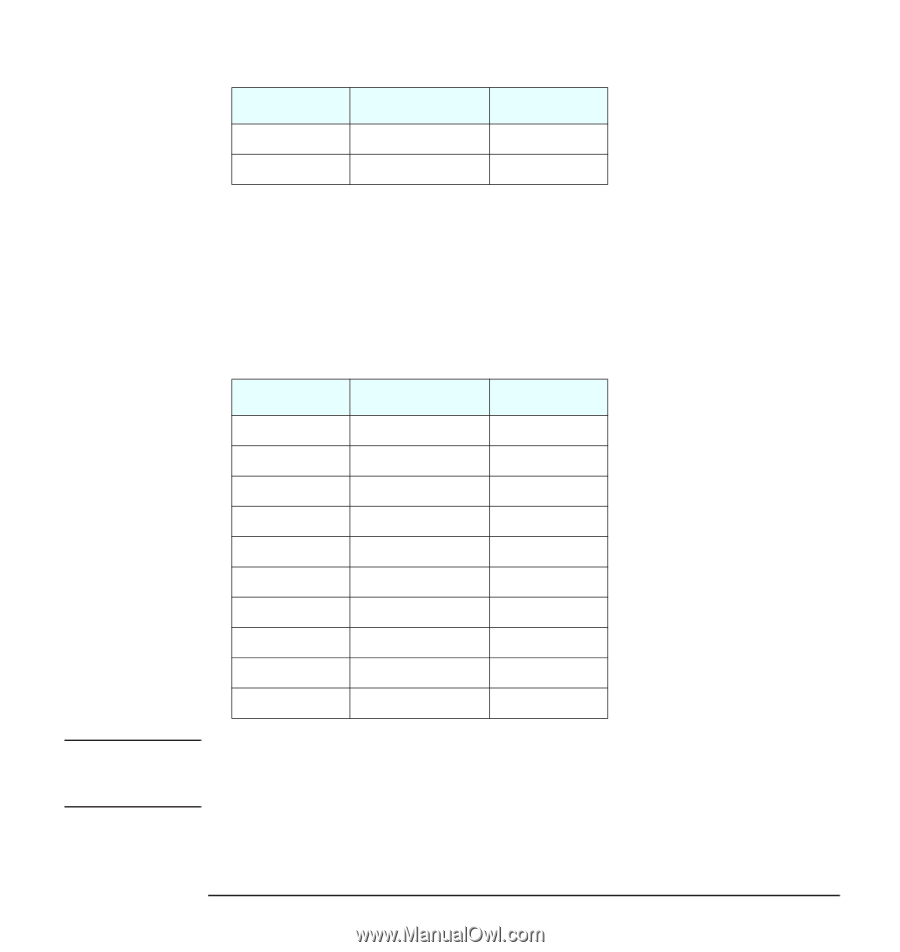
NOTE Using Sound on Your PC Sound Board Connectors Pin 1 2 Signal Power signal out Analog Ground I/O OUT - Multimedia Control Panel Connector The Multimedia Control Panel Connector is a 10-pin connector that allows headphones to be connected and the sound board output volume to be controlled from an external source, such as the audio front panel mounted in some models of computer. The connector has these pin assignments: Pin 1 2 3 4 5 6 7 8 9 10 Signal Analog Ground Key Way Front panel input left Front panel return left Front panel input right Front panel return right Volume low limit Volume high limit Volume adjust left Volume adjust right I/O IN OUT IN OUT - Jumper blocks are required between pins 3 and 4 and between pins 5 and 6 of this connector. Without these jumpers, the sound board will not output sound through the rear panel. (These jumper connections are supplied as standard.) English 25
-
 1
1 -
2
-
3
-
4
-
5
-
6
-
7
-
8
-
9
-
10
-
11
-
12
-
13
-
14
-
15
-
16
-
17
-
18
-
19
-
 20
20 -
 21
21 -
 22
22 -
 23
23 -
 24
24 -
 25
25 -
 26
26 -
 27
27 -
 28
28 -
 29
29 -
 30
30 -
31
-
32
-
33
-
34
-
35
-
36
-
37
-
38
-
39
-
40
 |
 |