HP LP2065 HP Display Assistant User Guide - Page 15
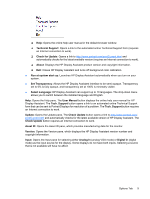
Creating Presets, Enter Preset, Select Preset name, Make this Preset the default, Select, Preset name
 |
UPC - 882780206175
View all HP LP2065 manuals
Add to My Manuals
Save this manual to your list of manuals |
Page 15 highlights
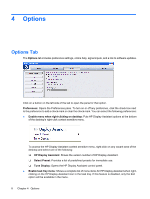
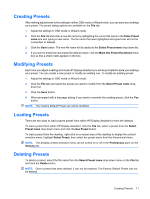
Creating Presets After making adjustments to the settings in either OSD mode or Wizard mode, you can save your settings as a preset. The preset dialog options are available on the File tab. 1. Adjust the settings in OSD mode or Wizard mode. 2. Click the File tab and enter a new file name by highlighting the current file name in the Enter Preset name box and typing a new name. The file name that was highlighted and typed over will not be overwritten or deleted. 3. Click the Save button. The new file name will be added to the Select Preset name drop-down list. 4. If you want to make the new preset the default preset, click the Make this Preset the default check box so that a check mark appears in the box. Modifying Presets Each time you adjust a setting and close HP Display Assistant you will be prompted to save your settings as a preset. You can create a new preset or modify an existing one. To modify an existing preset: 1. Adjust the settings in OSD mode or Wizard mode. 2. Click the File tab and select the preset you want to modify from the Select Preset name drop- down list. 3. Click the Save button. 4. When prompted with a message asking if you want to overwrite the existing preset, click the Yes button. NOTE: The Factory Default Preset can not be modified. Loading Presets There are two ways to load a saved preset: from within HP Display Assistant or from the desktop. To load a preset from within HP Display Assistant, click the File tab, select a preset from the Select Preset name drop-down menu and click the Use Preset button. To load a preset from the desktop, right-click on a vacant area of the desktop to display the context sensitive menu, highlight Select Preset, then select the preset name from the hierarchical menu. NOTE: The desktop context sensitive menu can be turned on or off in the Preferences pane on the Options tab. Deleting Presets To delete a preset, select the file name from the Select Preset name drop-down menu on the File tab and click the Delete button. NOTE: Once a preset has been deleted, it can not be restored. The Factory Default Preset can not be deleted. Creating Presets 11
-
 1
1 -
2
-
3
-
4
-
5
-
6
-
7
-
8
-
9
-
 10
10 -
 11
11 -
 12
12 -
 13
13 -
 14
14 -
 15
15 -
 16
16 -
 17
17 -
 18
18 -
 19
19 -
 20
20 -
21
-
22
-
23
-
24
 |
 |