HP LP2065 HP Display Assistant User Guide - Page 8
OSD Mode, Adjust Tab, Adjusting the Settings, Adjust, Brightness, Pattern, Contrast, Focus, Auto Setup - resolution
 |
UPC - 882780206175
View all HP LP2065 manuals
Add to My Manuals
Save this manual to your list of manuals |
Page 8 highlights
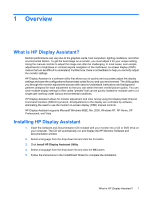
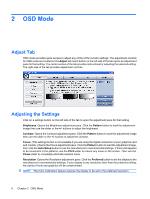
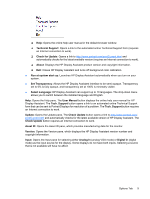
2 OSD Mode Adjust Tab OSD mode provides quick access to adjust any of the of the monitor settings. The adjustment controls for OSD mode are located on the Adjust tab. Each button on the left side of the tab opens an adjustment pane for that setting. The center section of the tab provides instructions for adjusting the selected setting. The right side of the tab provides adjustment controls. Adjusting the Settings Click on a settings button on the left side of the tab to open the adjustment pane for that setting. Brightness: Opens the Brightness adjustment pane. Click the Pattern button to load the adjustment image then use the slider or the +/- buttons to adjust the brightness. Contrast: Opens the Contrast adjustment pane. Click the Pattern button to load the adjustment image then use the slider or the +/- buttons to adjust the contrast. Focus: (This settings button is not available if you are using the digital connection of your graphics card and monitor.) Opens the Focus adjustment pane. Click the Pattern button to load the adjustment image, then click the Auto Setup button to use the manufacturer's recommended settings. If there still appears to be movement in the patterns, use the Pitch slider to reduce any noise on the screen. Then use the Phase slider to completely eliminate residual noise. Resolution: Opens the Resolution adjustment pane. Click the Preferred button to set the display to the manufacturer's recommended settings. If your display is any resolution other than the preferred setting, the clarity of fonts and graphics will be compromised. NOTE: The Color Calibration feature requires the display to be set to the preferred resolution. 4 Chapter 2 OSD Mode
-
 1
1 -
2
-
 3
3 -
 4
4 -
 5
5 -
 6
6 -
 7
7 -
 8
8 -
 9
9 -
 10
10 -
 11
11 -
 12
12 -
 13
13 -
14
-
15
-
16
-
17
-
18
-
19
-
20
-
21
-
22
-
23
-
24
 |
 |