HP LaserJet Pro CP1525 HP LaserJet Pro CP1520 - Software Technical Reference - Page 104
General Windows installation for network connections, Network setup
 |
View all HP LaserJet Pro CP1525 manuals
Add to My Manuals
Save this manual to your list of manuals |
Page 104 highlights
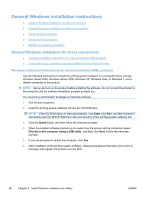
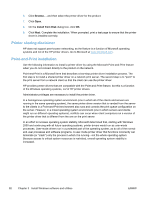
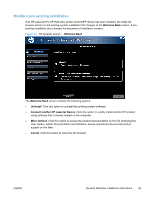
General Windows installation for network connections ● Network setup ● Windows installation instructions for network-connected products ● Printer-driver only installation instructions (Microsoft Add Printer Wizard) Network setup NOTE: Set up, turn on, and connect the product to the network before installing the software. To connect a product to a network, use the following instructions: 1. Connect the product to the network. 2. Turn on the product. NOTE: You must complete the power-up sequence in this order or the installer discovery utility fails to recognize the product. It might take a few minutes for the product to obtain a TCP/IP address. 3. Wait for 60 seconds before continuing. During this time, the network recognizes the product and assigns an IP address or host name for the product. 4. At the product control panel, press the OK button. 5. Press the OK button to select the Reports menu, and then press the OK button. 6. Press the right arrow to highlight the Config report option, and then press the OK button. 7. Find the IP address on the Self Test/Configuration page. HP Color LaserJet CP4525 Printers Embedded Jetdirect Page Windows installation instructions for network-connected products NOTE: Complete the network setup before completing this procedure. Each computer that has the printing-system software installed can use all of the product features that are available over a network connection. 90 Chapter 3 Install Windows software and utilities ENWW
-
 1
1 -
2
-
3
-
4
-
5
-
6
-
7
-
8
-
9
-
10
-
11
-
12
-
13
-
14
-
15
-
16
-
17
-
18
-
19
-
20
-
21
-
22
-
23
-
24
-
25
-
26
-
27
-
28
-
29
-
30
-
31
-
32
-
33
-
34
-
35
-
36
-
37
-
38
-
39
-
40
-
41
-
42
-
43
-
44
-
45
-
46
-
47
-
48
-
49
-
50
-
51
-
52
-
53
-
54
-
55
-
56
-
57
-
58
-
59
-
60
-
61
-
62
-
63
-
64
-
65
-
66
-
67
-
68
-
69
-
70
-
71
-
72
-
73
-
74
-
75
-
76
-
77
-
78
-
79
-
80
-
81
-
82
-
83
-
84
-
85
-
86
-
87
-
88
-
89
-
90
-
91
-
92
-
93
-
94
-
95
-
96
-
97
-
98
-
 99
99 -
 100
100 -
 101
101 -
 102
102 -
 103
103 -
 104
104 -
 105
105 -
 106
106 -
 107
107 -
 108
108 -
 109
109 -
110
-
111
-
112
-
113
-
114
-
115
-
116
-
117
-
118
-
119
-
120
-
121
-
122
-
123
-
124
-
125
-
126
-
127
-
128
-
129
-
130
-
131
-
132
-
133
-
134
-
135
-
136
-
137
-
138
-
139
-
140
-
141
-
142
-
143
-
144
-
145
-
146
-
147
-
148
-
149
-
150
-
151
-
152
-
153
-
154
-
155
-
156
-
157
-
158
-
159
-
160
-
161
-
162
-
163
-
164
-
165
-
166
-
167
-
168
-
169
-
170
-
171
-
172
-
173
-
174
-
175
-
176
-
177
-
178
-
179
-
180
-
181
-
182
-
183
-
184
-
185
-
186
-
187
-
188
-
189
-
190
-
191
-
192
-
193
-
194
-
195
-
196
-
197
-
198
-
199
-
200
 |
 |
