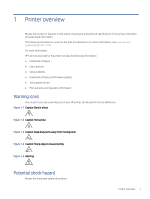
HP LaserJet Pro MFP 4101-4104dw User Guide 2 - Page 15
Control panel view,
 |
View all HP LaserJet Pro MFP 4101-4104dw manuals
Add to My Manuals
Save this manual to your list of manuals |
Page 15 highlights
Figure 1-7 Printer rear view 9 1 2 3 8 4 7 5 6 Number Description 1 USB port (for job storage and private printing) NOTE: This port should remain covered when not in use. 2 USB interface port 3 Ethernet port 4 Telephone "line out" port (for attaching an extension phone, answering machine, or other device) NOTE: This port should remain covered when not in use. 5 Fax "line in" port (for attaching the fax phone line to the printer) 6 Power connection 7 Tray 3 (optional) NOTE: Tray 3 extends when legal-size or A4-size paper is loaded. 8 Dust cover for Tray 2 NOTE: Dust cover flips up when legal-size or A4-size paper is loaded. 9 Rear door (provides access for clearing jams) Control panel view Identify the buttons and features on the touchscreen control panel. The Home screen provides access to the printer features and indicates the current status of the printer. 4 Chapter 1 Printer overview
-
 1
1 -
2
-
3
-
4
-
5
-
6
-
7
-
8
-
9
-
 10
10 -
 11
11 -
 12
12 -
 13
13 -
 14
14 -
 15
15 -
 16
16 -
 17
17 -
 18
18 -
 19
19 -
 20
20 -
21
-
22
-
23
-
24
-
25
-
26
-
27
-
28
-
29
-
30
-
31
-
32
-
33
-
34
-
35
-
36
-
37
-
38
-
39
-
40
-
41
-
42
-
43
-
44
-
45
-
46
-
47
-
48
-
49
-
50
-
51
-
52
-
53
-
54
-
55
-
56
-
57
-
58
-
59
-
60
-
61
-
62
-
63
-
64
-
65
-
66
-
67
-
68
-
69
-
70
-
71
-
72
-
73
-
74
-
75
-
76
-
77
-
78
-
79
-
80
-
81
-
82
-
83
-
84
-
85
-
86
-
87
-
88
-
89
-
90
-
91
-
92
-
93
-
94
-
95
-
96
-
97
-
98
-
99
-
100
-
101
-
102
-
103
-
104
-
105
-
106
-
107
-
108
-
109
-
110
-
111
-
112
-
113
-
114
-
115
-
116
-
117
-
118
-
119
-
120
-
121
-
122
-
123
-
124
-
125
-
126
-
127
-
128
-
129
-
130
-
131
-
132
-
133
-
134
-
135
-
136
-
137
-
138
-
139
-
140
-
141
-
142
-
143
-
144
-
145
-
146
-
147
-
148
-
149
-
150
-
151
-
152
-
153
-
154
-
155
-
156
-
157
-
158
-
159
-
160
-
161
-
162
-
163
-
164
-
165
-
166
-
167
-
168
-
169
-
170
-
171
-
172
-
173
-
174
-
175
-
176
-
177
-
178
-
179
-
180
-
181
-
182
-
183
-
184
-
185
-
186
-
187
-
188
-
189
-
190
-
191
-
192
-
193
-
194
-
195
-
196
-
197
-
198
-
199
-
200
-
201
-
202
-
203
-
204
 |
 |
